Oracle Backend with Firebase APIs, Part 2: Hands-On with Auth, Database and Storage
Part 2 of a two-part series on Oracle Backend with Firebase APIs: Part 1 - What it is and setting it up · Part 2 - Hands-on with auth, database and storage.
In Part 1 we installed Fusabase, created a project with the quickstart and ended with a node index.js that printed { appName: '[DEFAULT]', type: 'oracledb' }. Nice, but nobody ships a console.log.
This time we build something real: a small todo application, split into demos that map onto the core services, plus a realtime finale:
- Authentication - sign up, sign in, Google login
- Database - a per-user todo list on document collections
- Storage - file attachments per user
- Realtime - the same list, live on two devices at once
All the code is on GitHub: github.com/vito-vanhecke/fusabase-demo. For the first three we follow the same loop: touch it from the app, hit a wall, fix it in the Console, then go back to the Console to see what happened. Because that’s the spoiler: almost nothing works on the first try, and that turns out to be the best part of the story.
The demo app
The repo is a plain Vite project with four self-contained demo folders and one shared config:
fusabase-demo/
├── fusabase-config.js      # the app config from Part 1
├── demos/
│   ├── 01-auth/            # demo 1: authentication
│   ├── 02-database/        # demo 2: the todo list
│   ├── 03-storage/         # demo 3: attachments
│   └── 04-realtime/        # demo 4: live sync with onSnapshot
├── rules/                  # the security rules we'll publish
│   ├── database.rules
│   └── storage.rules
└── scripts/screenshots.mjs # regenerates every app screenshot in this post
git clone https://github.com/vito-vanhecke/fusabase-demo.git
cd fusabase-demo && npm install && npm run dev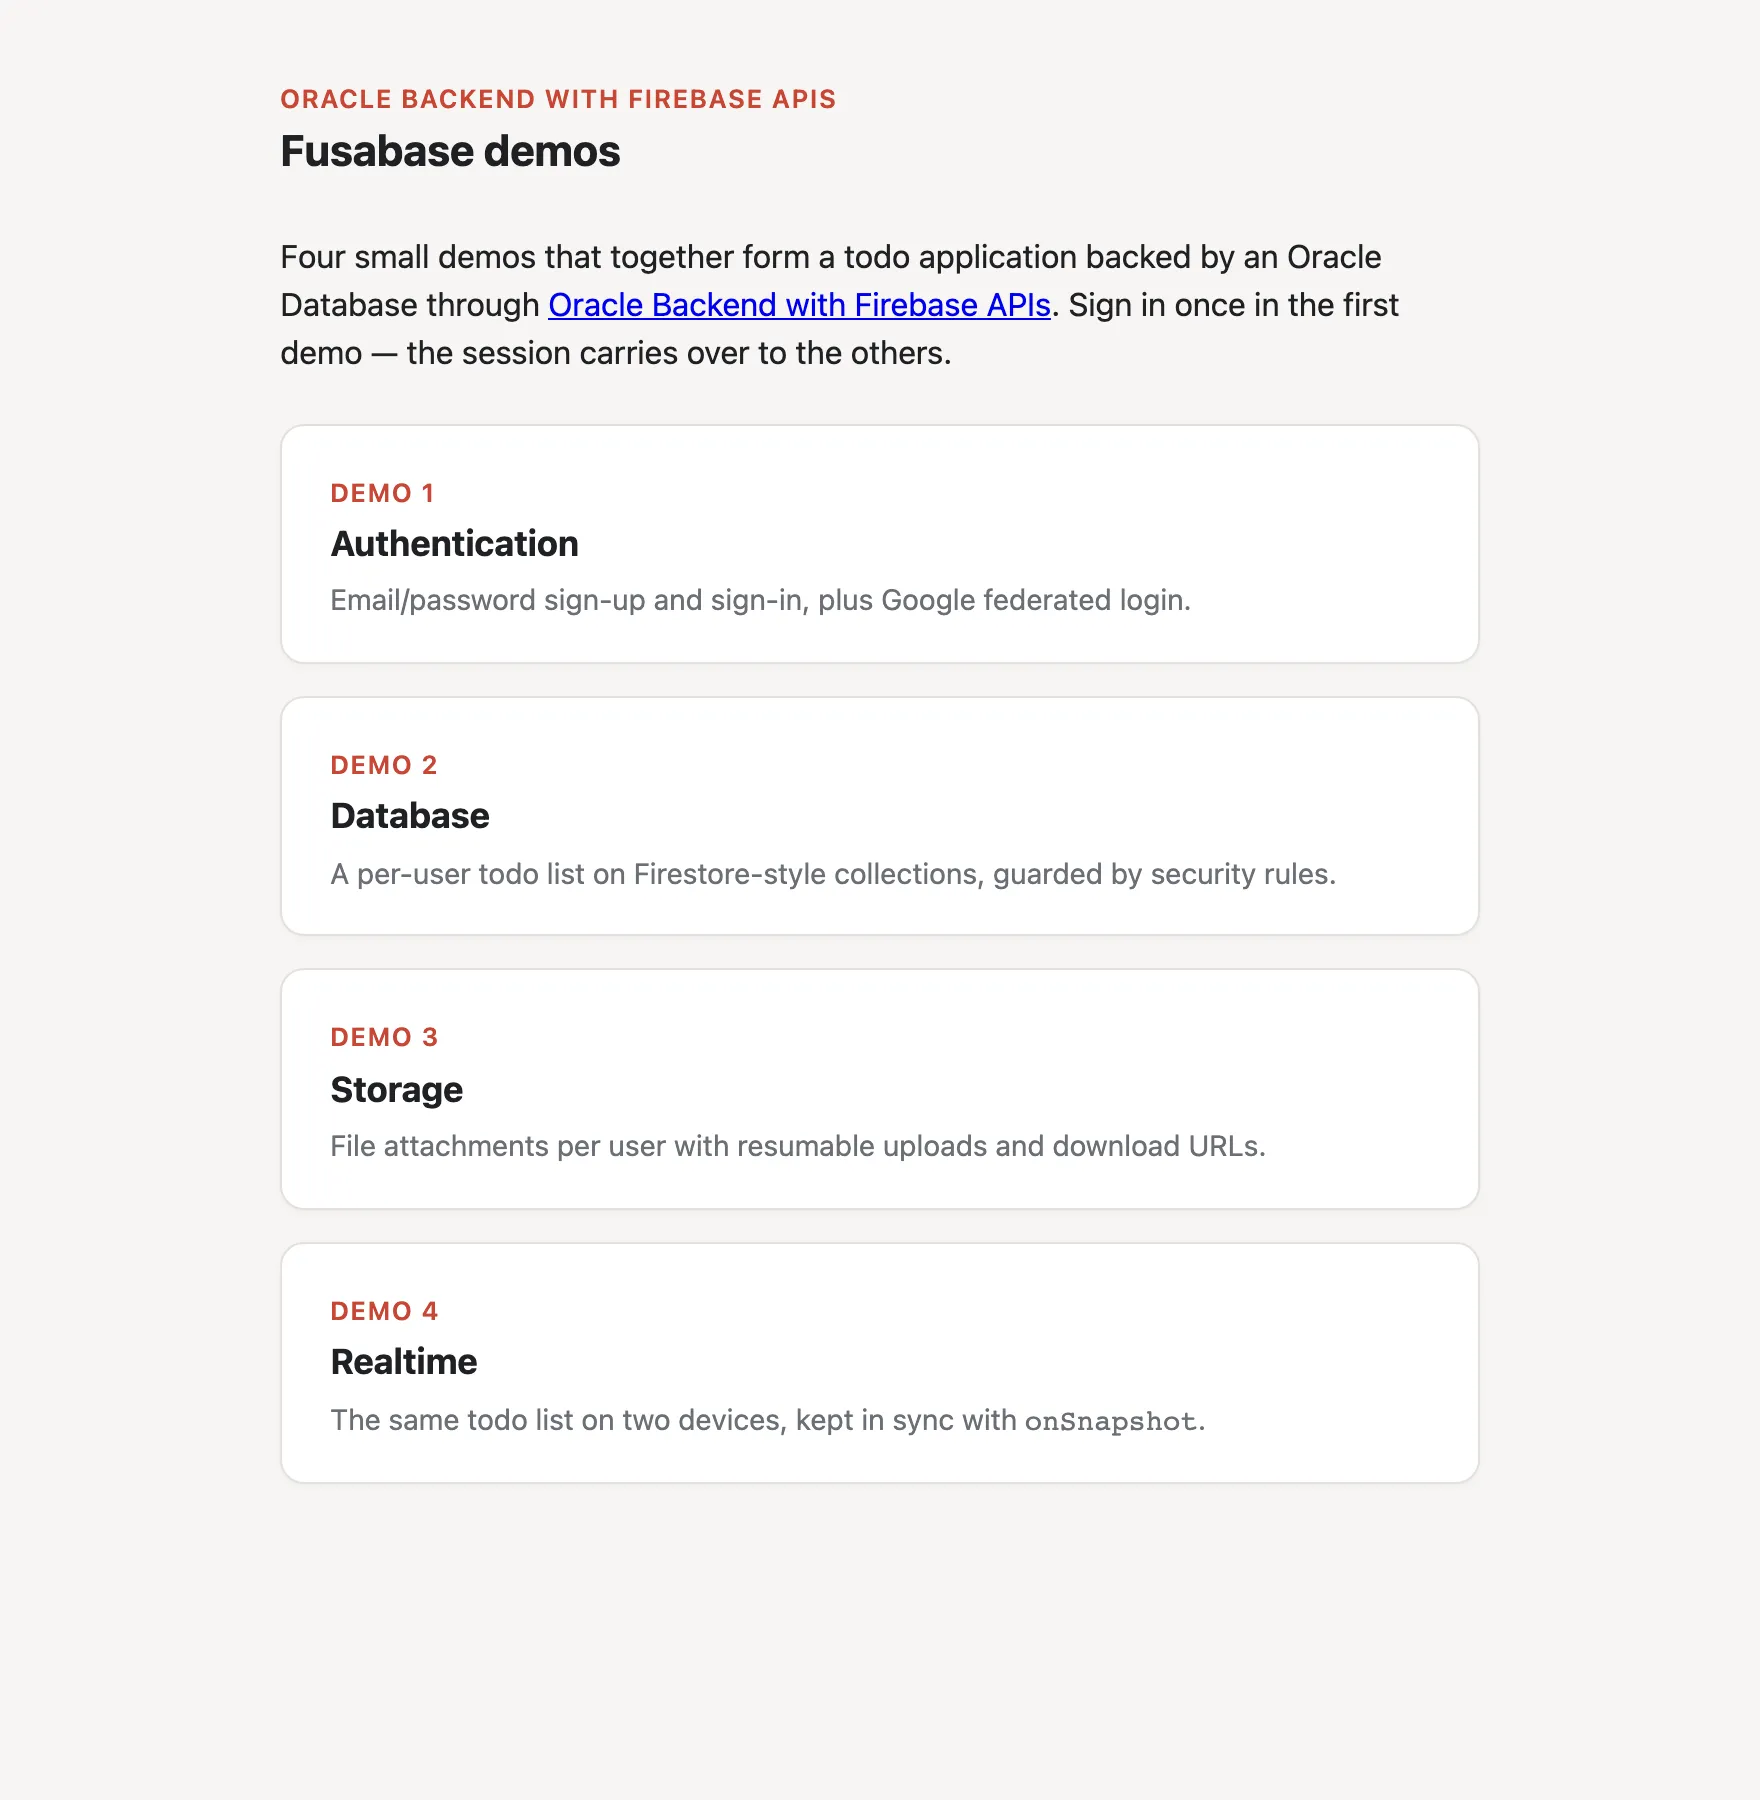
Every demo starts the same way, with the config object the Console generated for the WEBDEMO app back in Part 1:
// fusabase-config.js
export const fusabaseConfig = {
  schema: "vito",
  app_name: "WEBDEMO",
  app_type: "WEB",
  app_id: "58D64B0C789F4307E063F40D1FAC19AD",
  objs_type: "dbfs",
  project_id: "58D6470B91BF4302E063F40D1FAC8719",
  storage_bucket: "dbfs_YALOWOGCQGWKBQN",
  auth_type: "base",
  auth_id: "58D6470B91C34302E063F40D1FAC8719",
  ords_host: "https://oracle.vvanhecke.be/ords/vito/",
};
Yes, that’s all committed to a public repo, and no, that’s not a leak. Exactly like a Firebase config object, this is client-side configuration: every browser that loads the app gets it anyway. Access control comes from authentication and security rules, which is precisely what this post is about.
Demo 1: Authentication
Configure it in the Console
The first decision is the authentication type, one per project: BASIC, LDAP or IDCS. This is just where the user accounts are stored. BASIC keeps them in an ordinary table inside your own database schema. LDAP reuses an existing company directory server (the kind that already holds staff logins). IDCS hands sign-in off to Oracle’s cloud identity service.
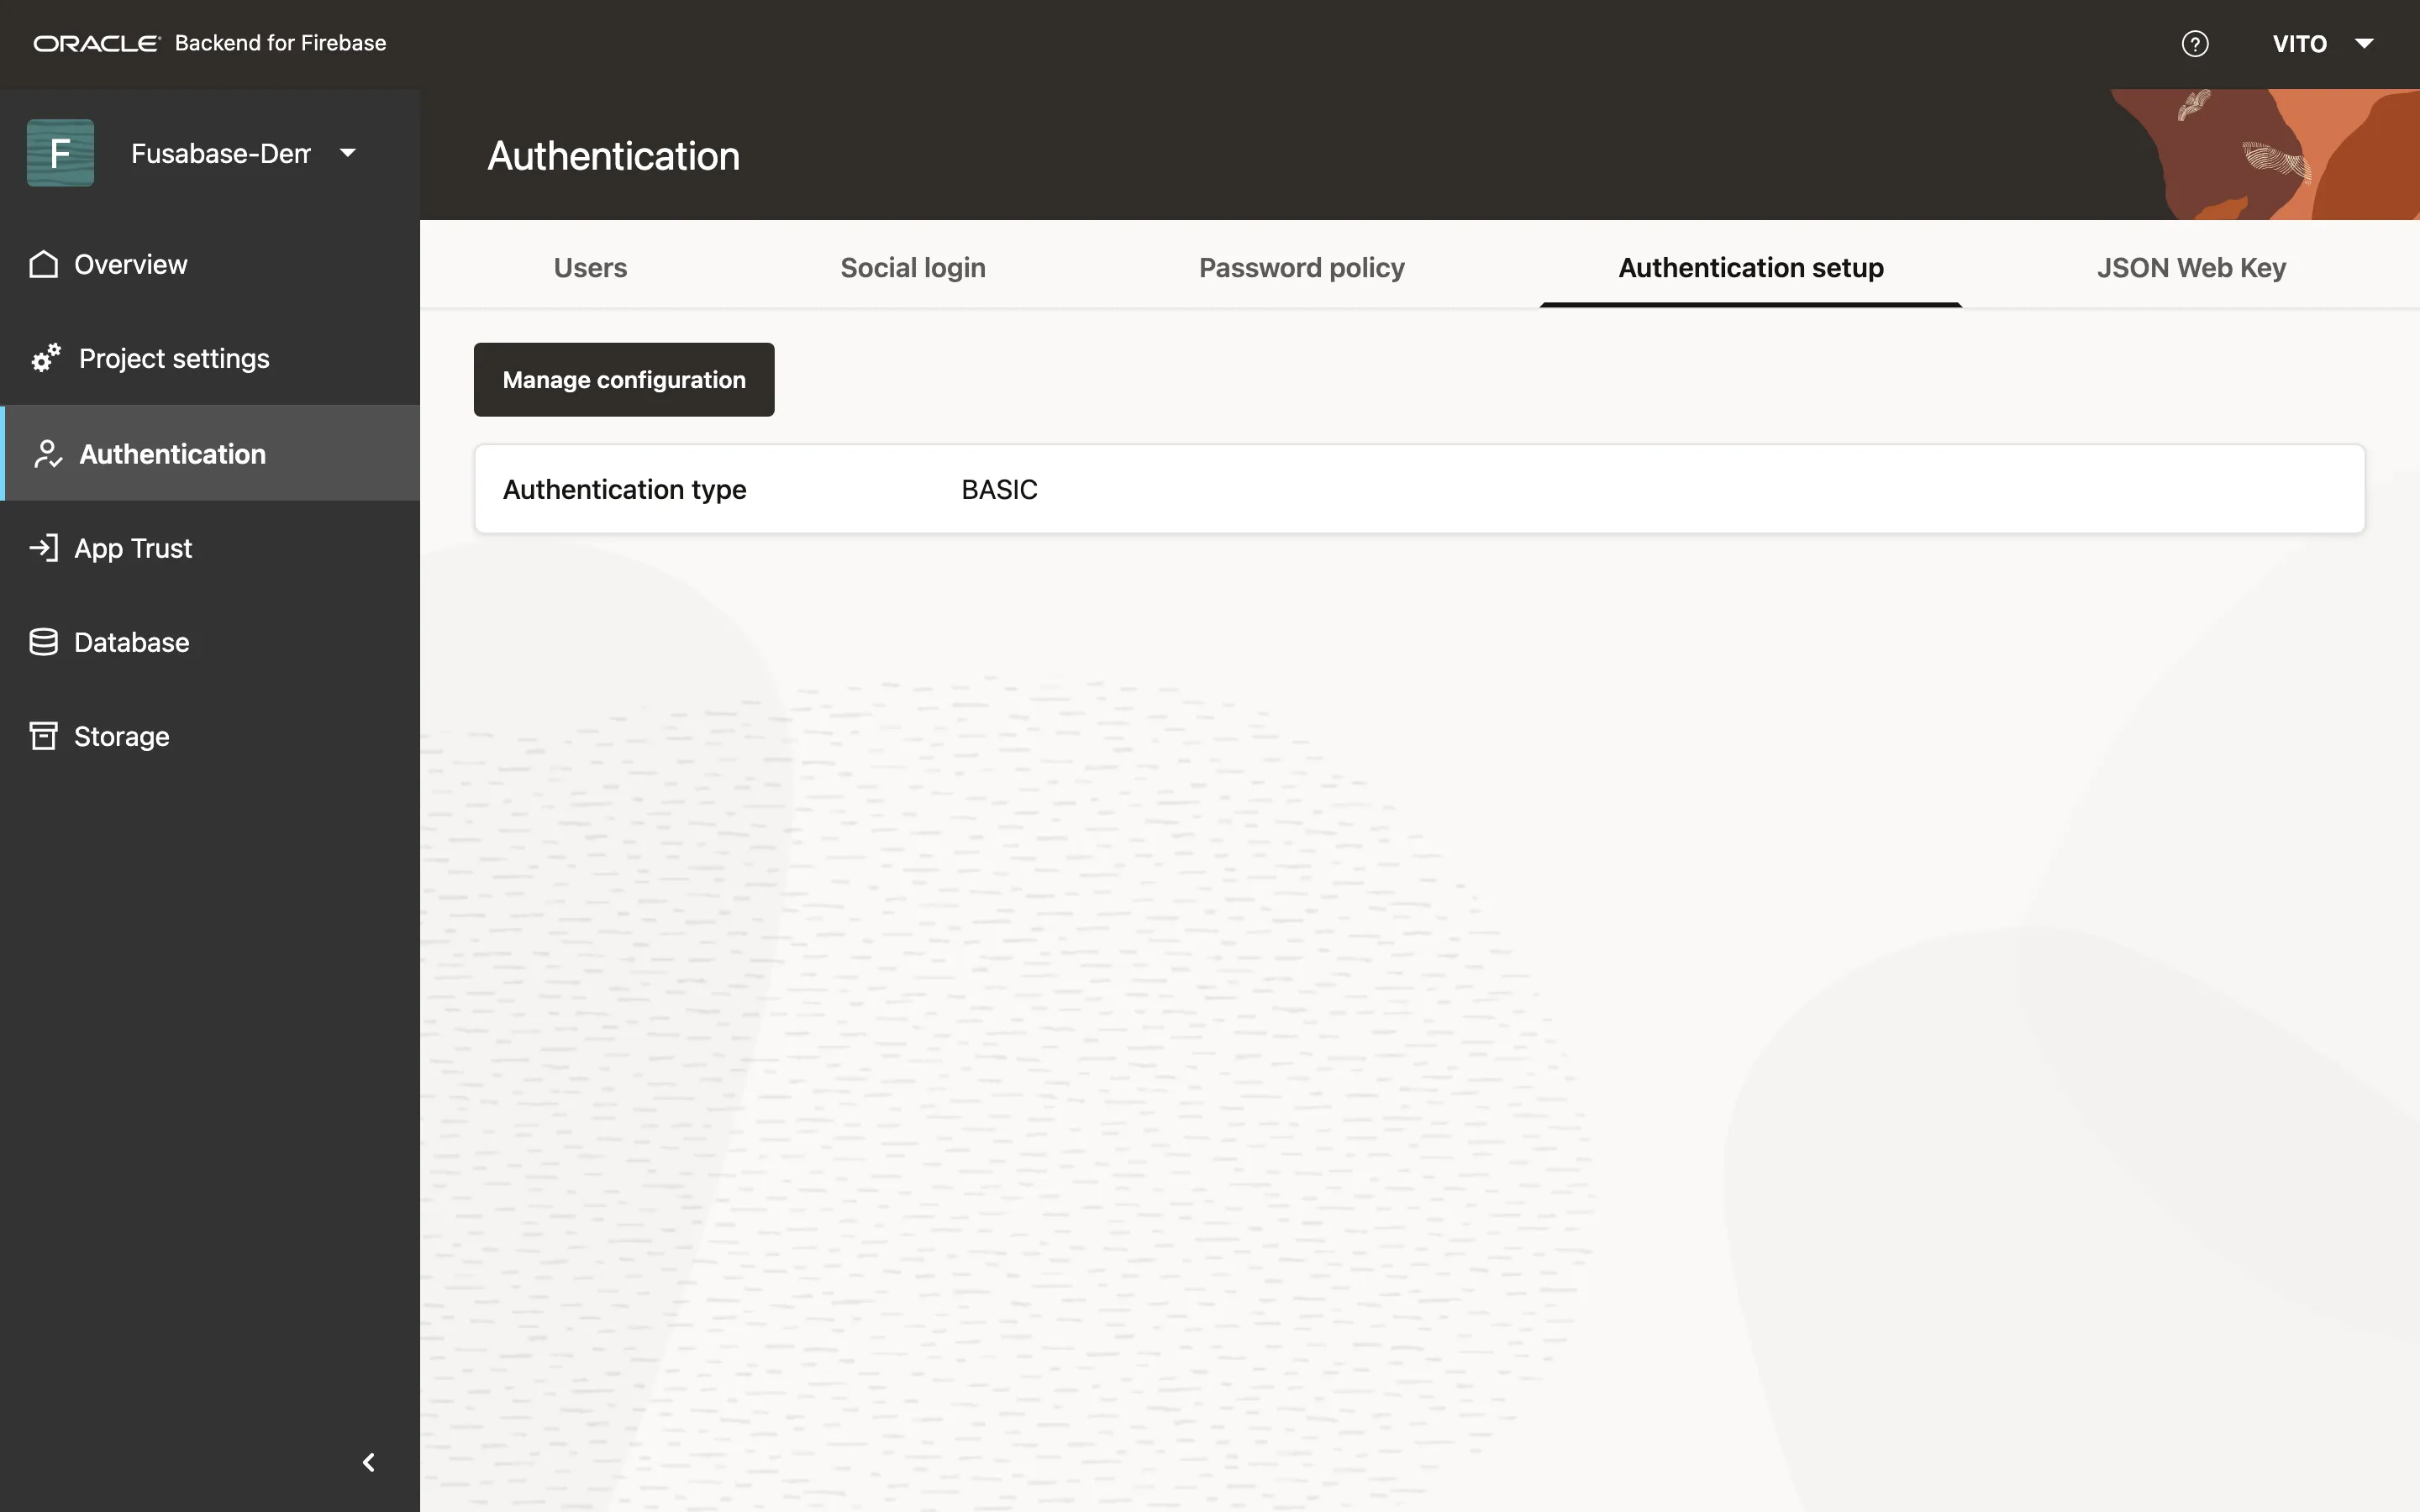
While you’re on this page: the password policy (length 6-30 plus the usual “must contain a number/symbol” toggles) and your outgoing email server settings (SMTP) live here too. Without an email server configured, the app can’t send the verification and password-reset emails.
I also enabled Google sign-in. It’s the standard “Sign in with Google” setup (OAuth, the same handshake every “Sign in with…” button uses): create a client ID and secret in the Google Cloud Console, give it the callback URL the Fusabase Console shows you, then paste Google’s client ID and secret back into the Console:
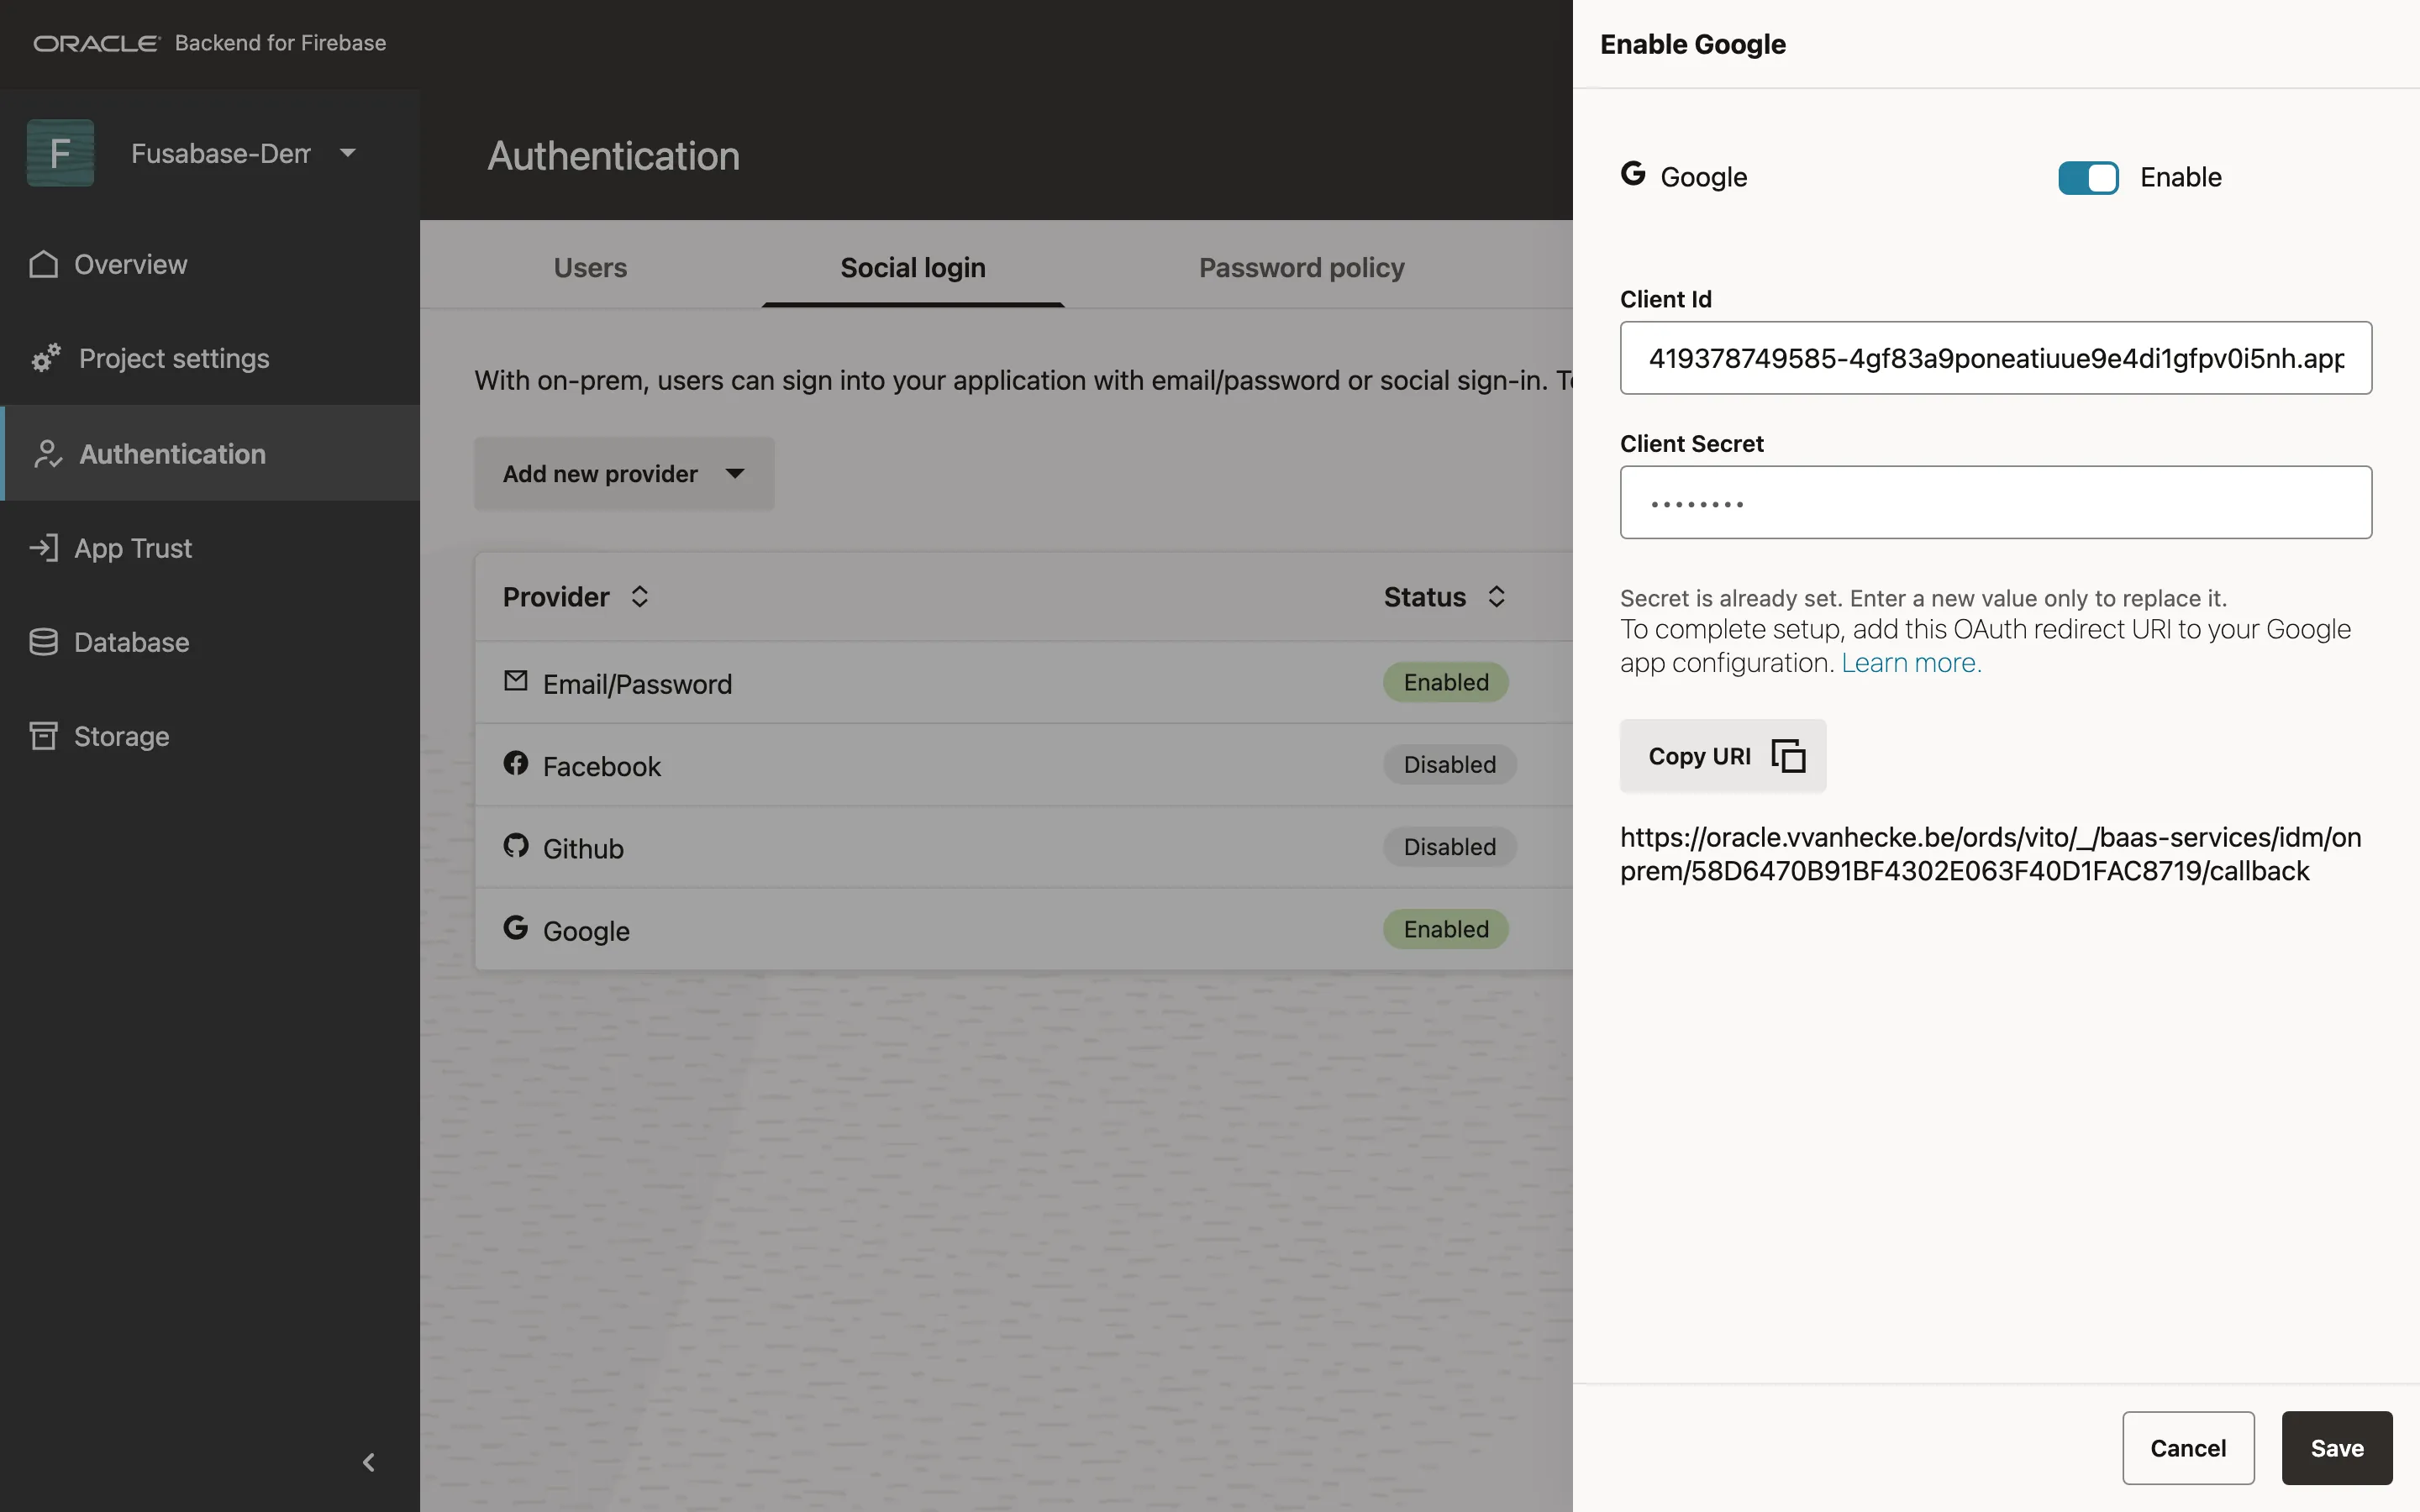
That is it! Google OAuth works just like it would in your APEX Applications.
Use it in the app
import { initializeApp } from "fusabase/app";
import {
  getAuth,
  onAuthStateChanged,
  createUserWithEmailAndPassword,
  signInWithEmailAndPassword,
  signInWithPopup,
  GoogleAuthProvider,
  signOut
} from "fusabase/auth";
import { fusabaseConfig } from "../../fusabase-config.js";

const app = initializeApp(fusabaseConfig);
const auth = getAuth(app);

// fires on sign-in, sign-out AND on page load with a restored session
onAuthStateChanged(auth, (user) => {
  console.log(user ? `signed in: ${user.uid}` : "signed out");
});

// email/password
await createUserWithEmailAndPassword(auth, email, password);
await signInWithEmailAndPassword(auth, email, password);

// Google
await signInWithPopup(auth, new GoogleAuthProvider());

await signOut(auth);
Demo 1 wraps that in a small page with a sign-up form, a sign-in form and a Google button:
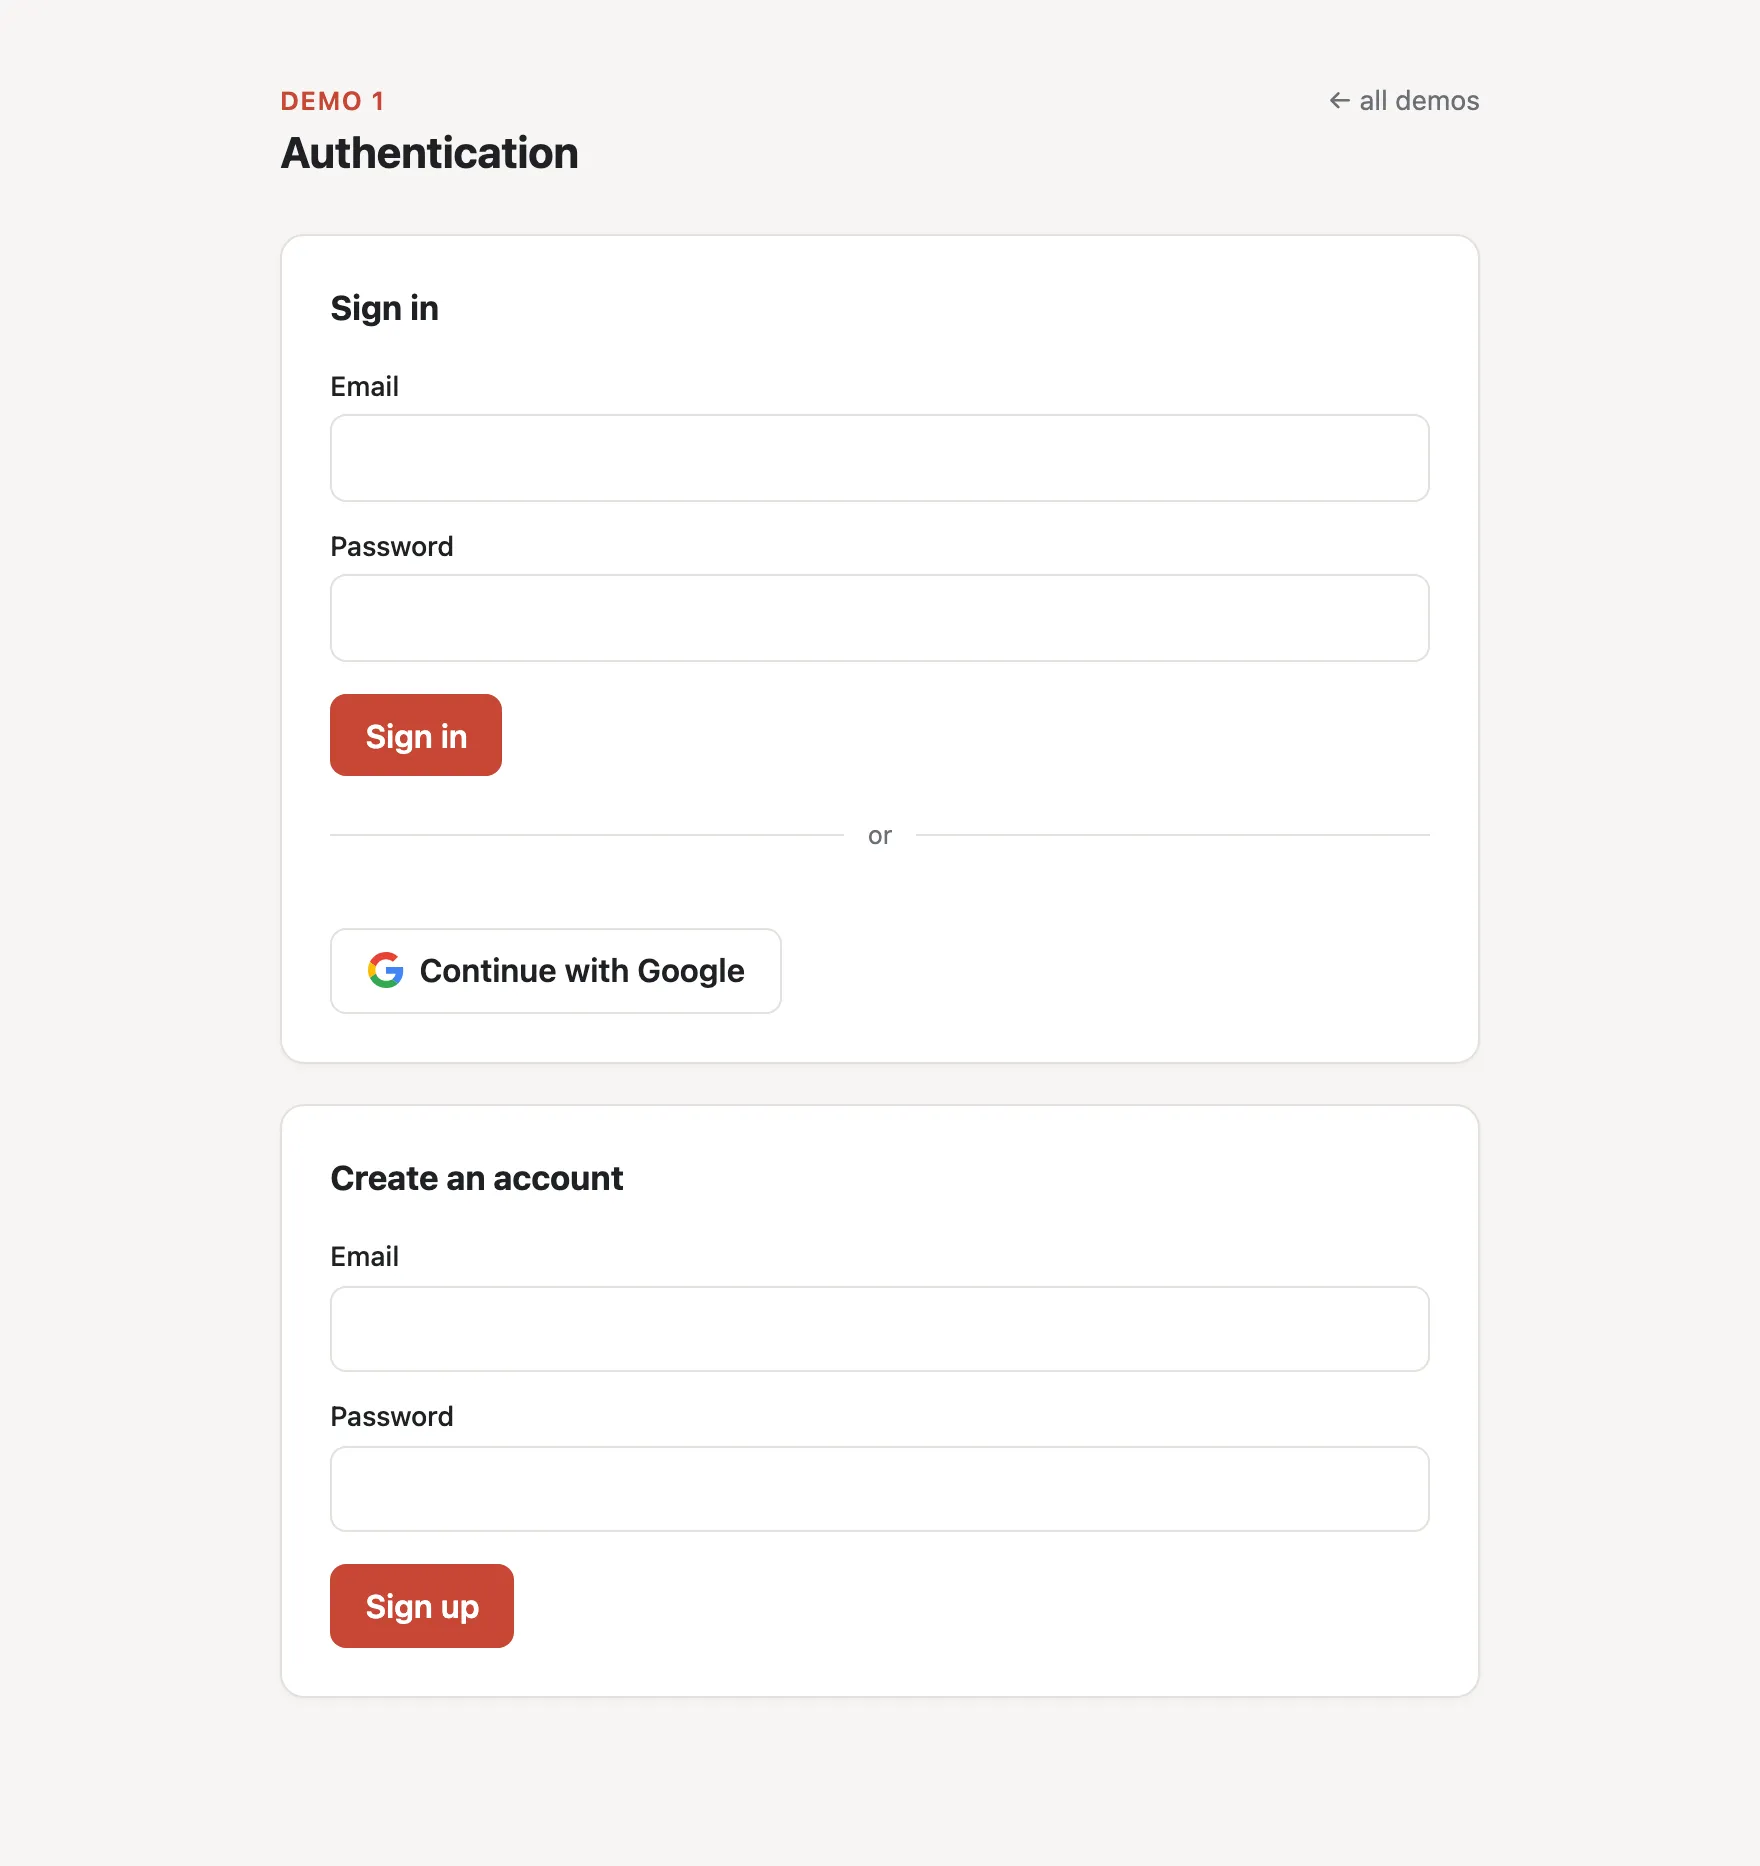
So I typed in an email and password, hit Sign in, and:
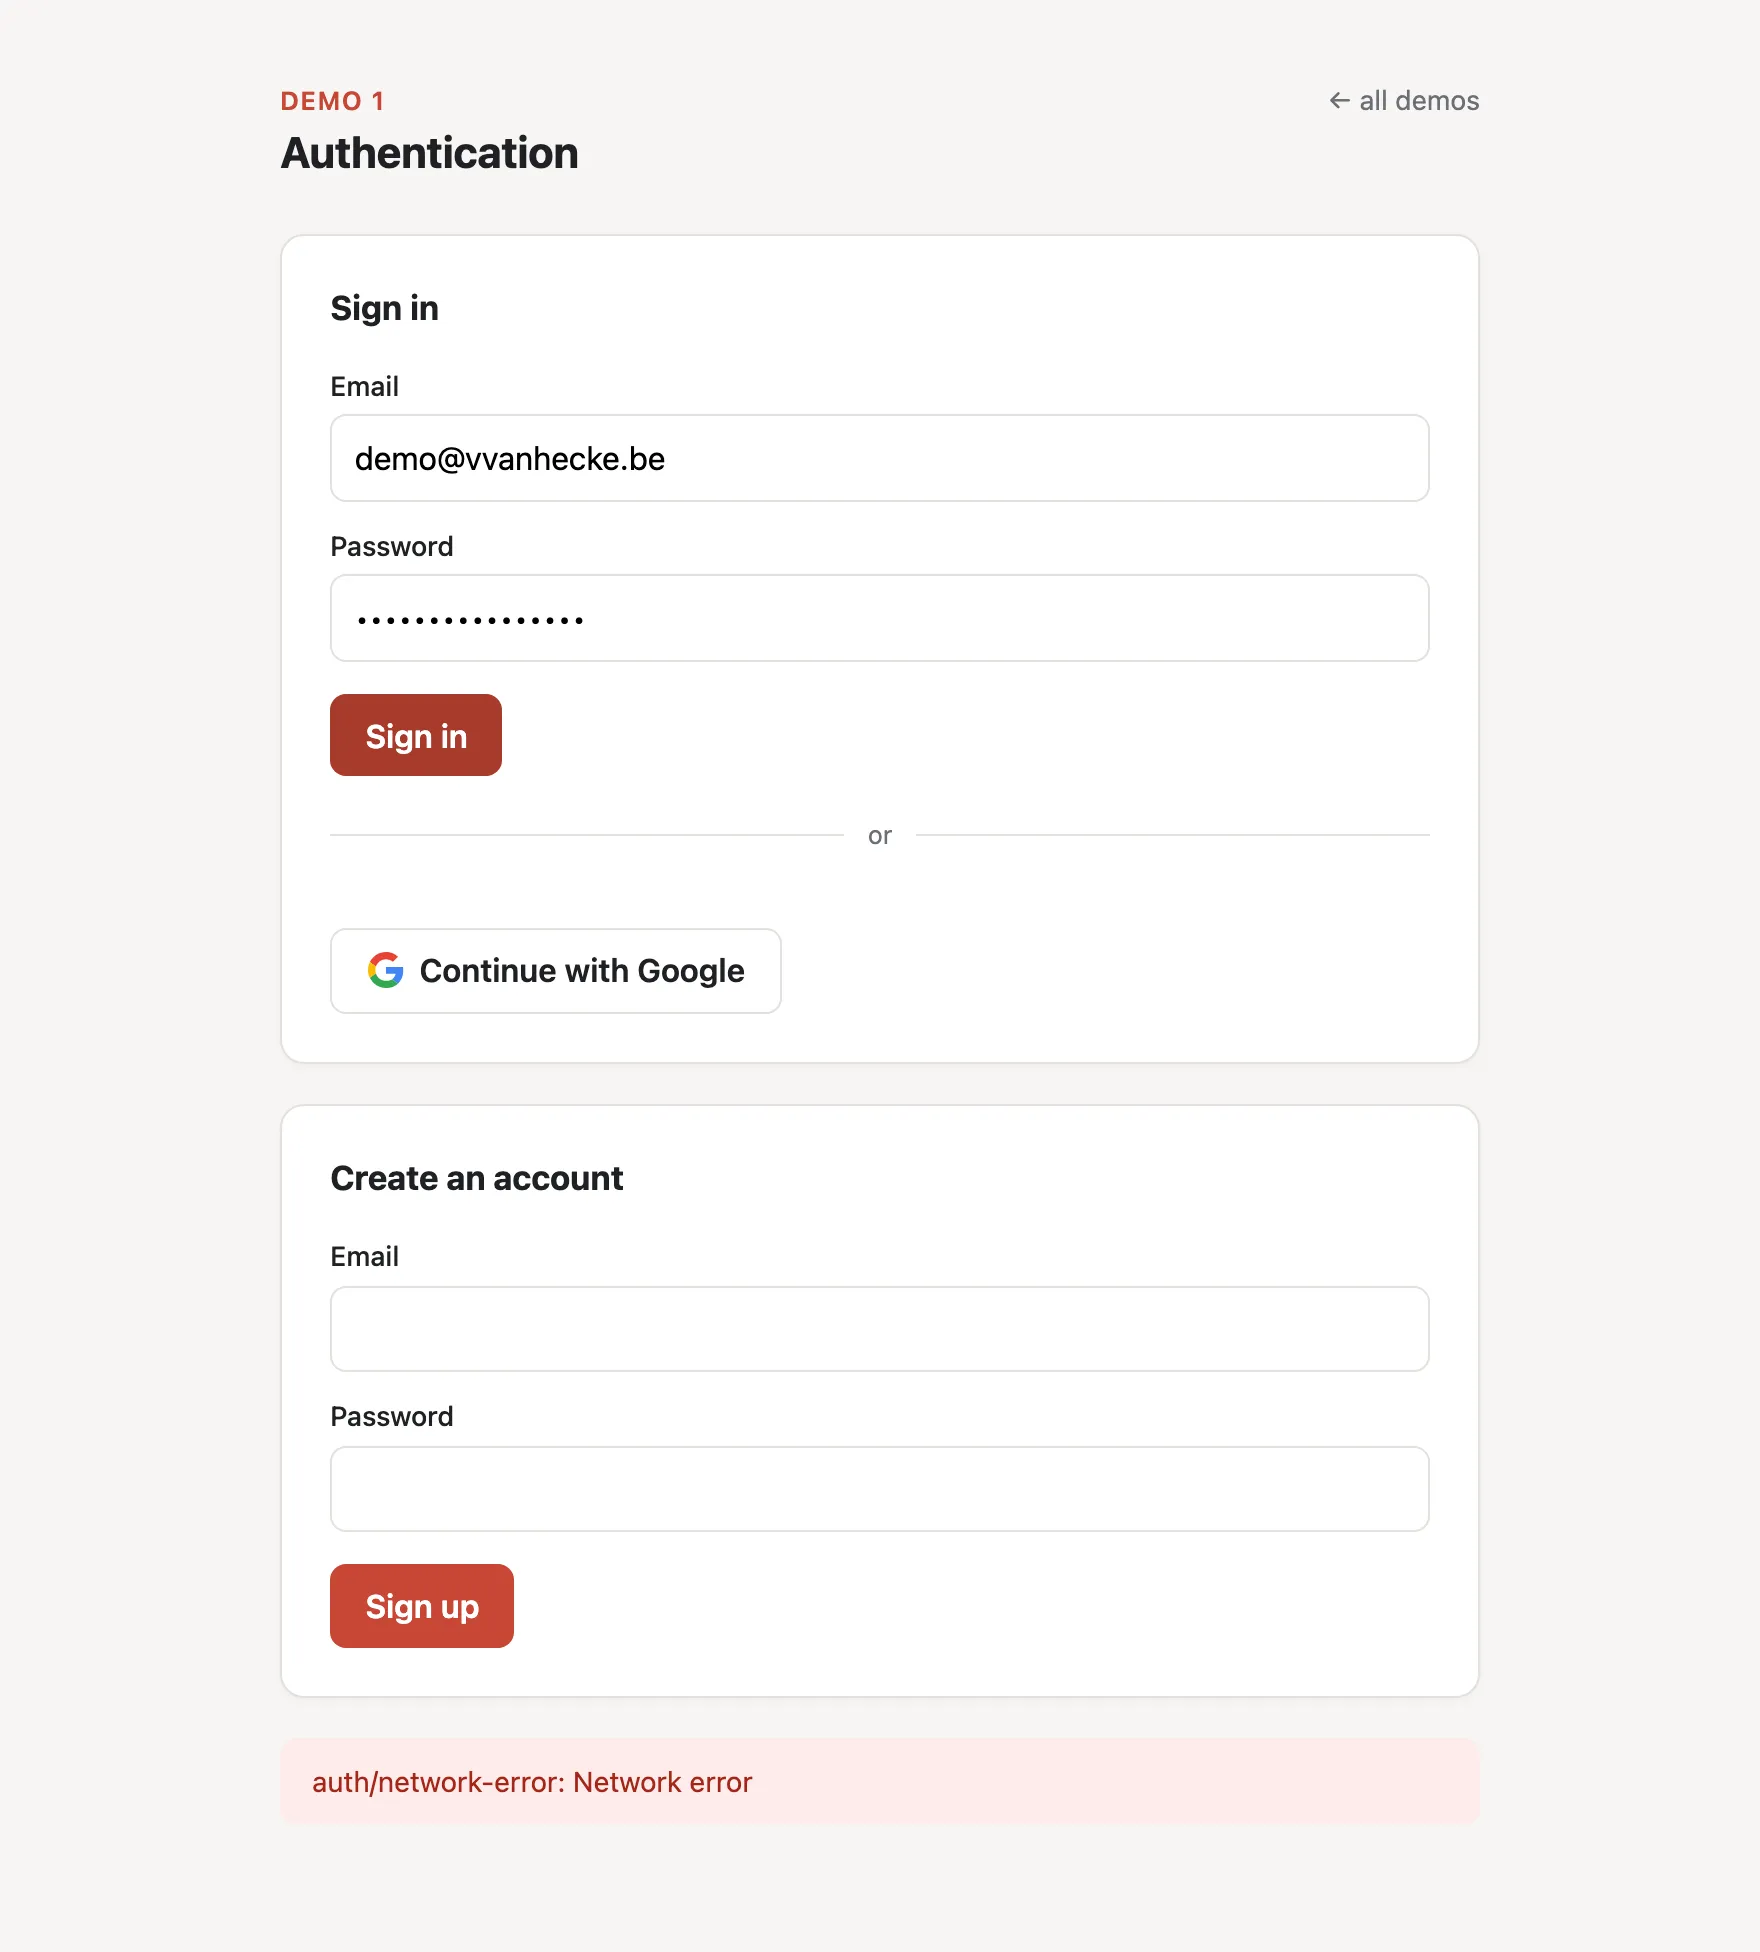
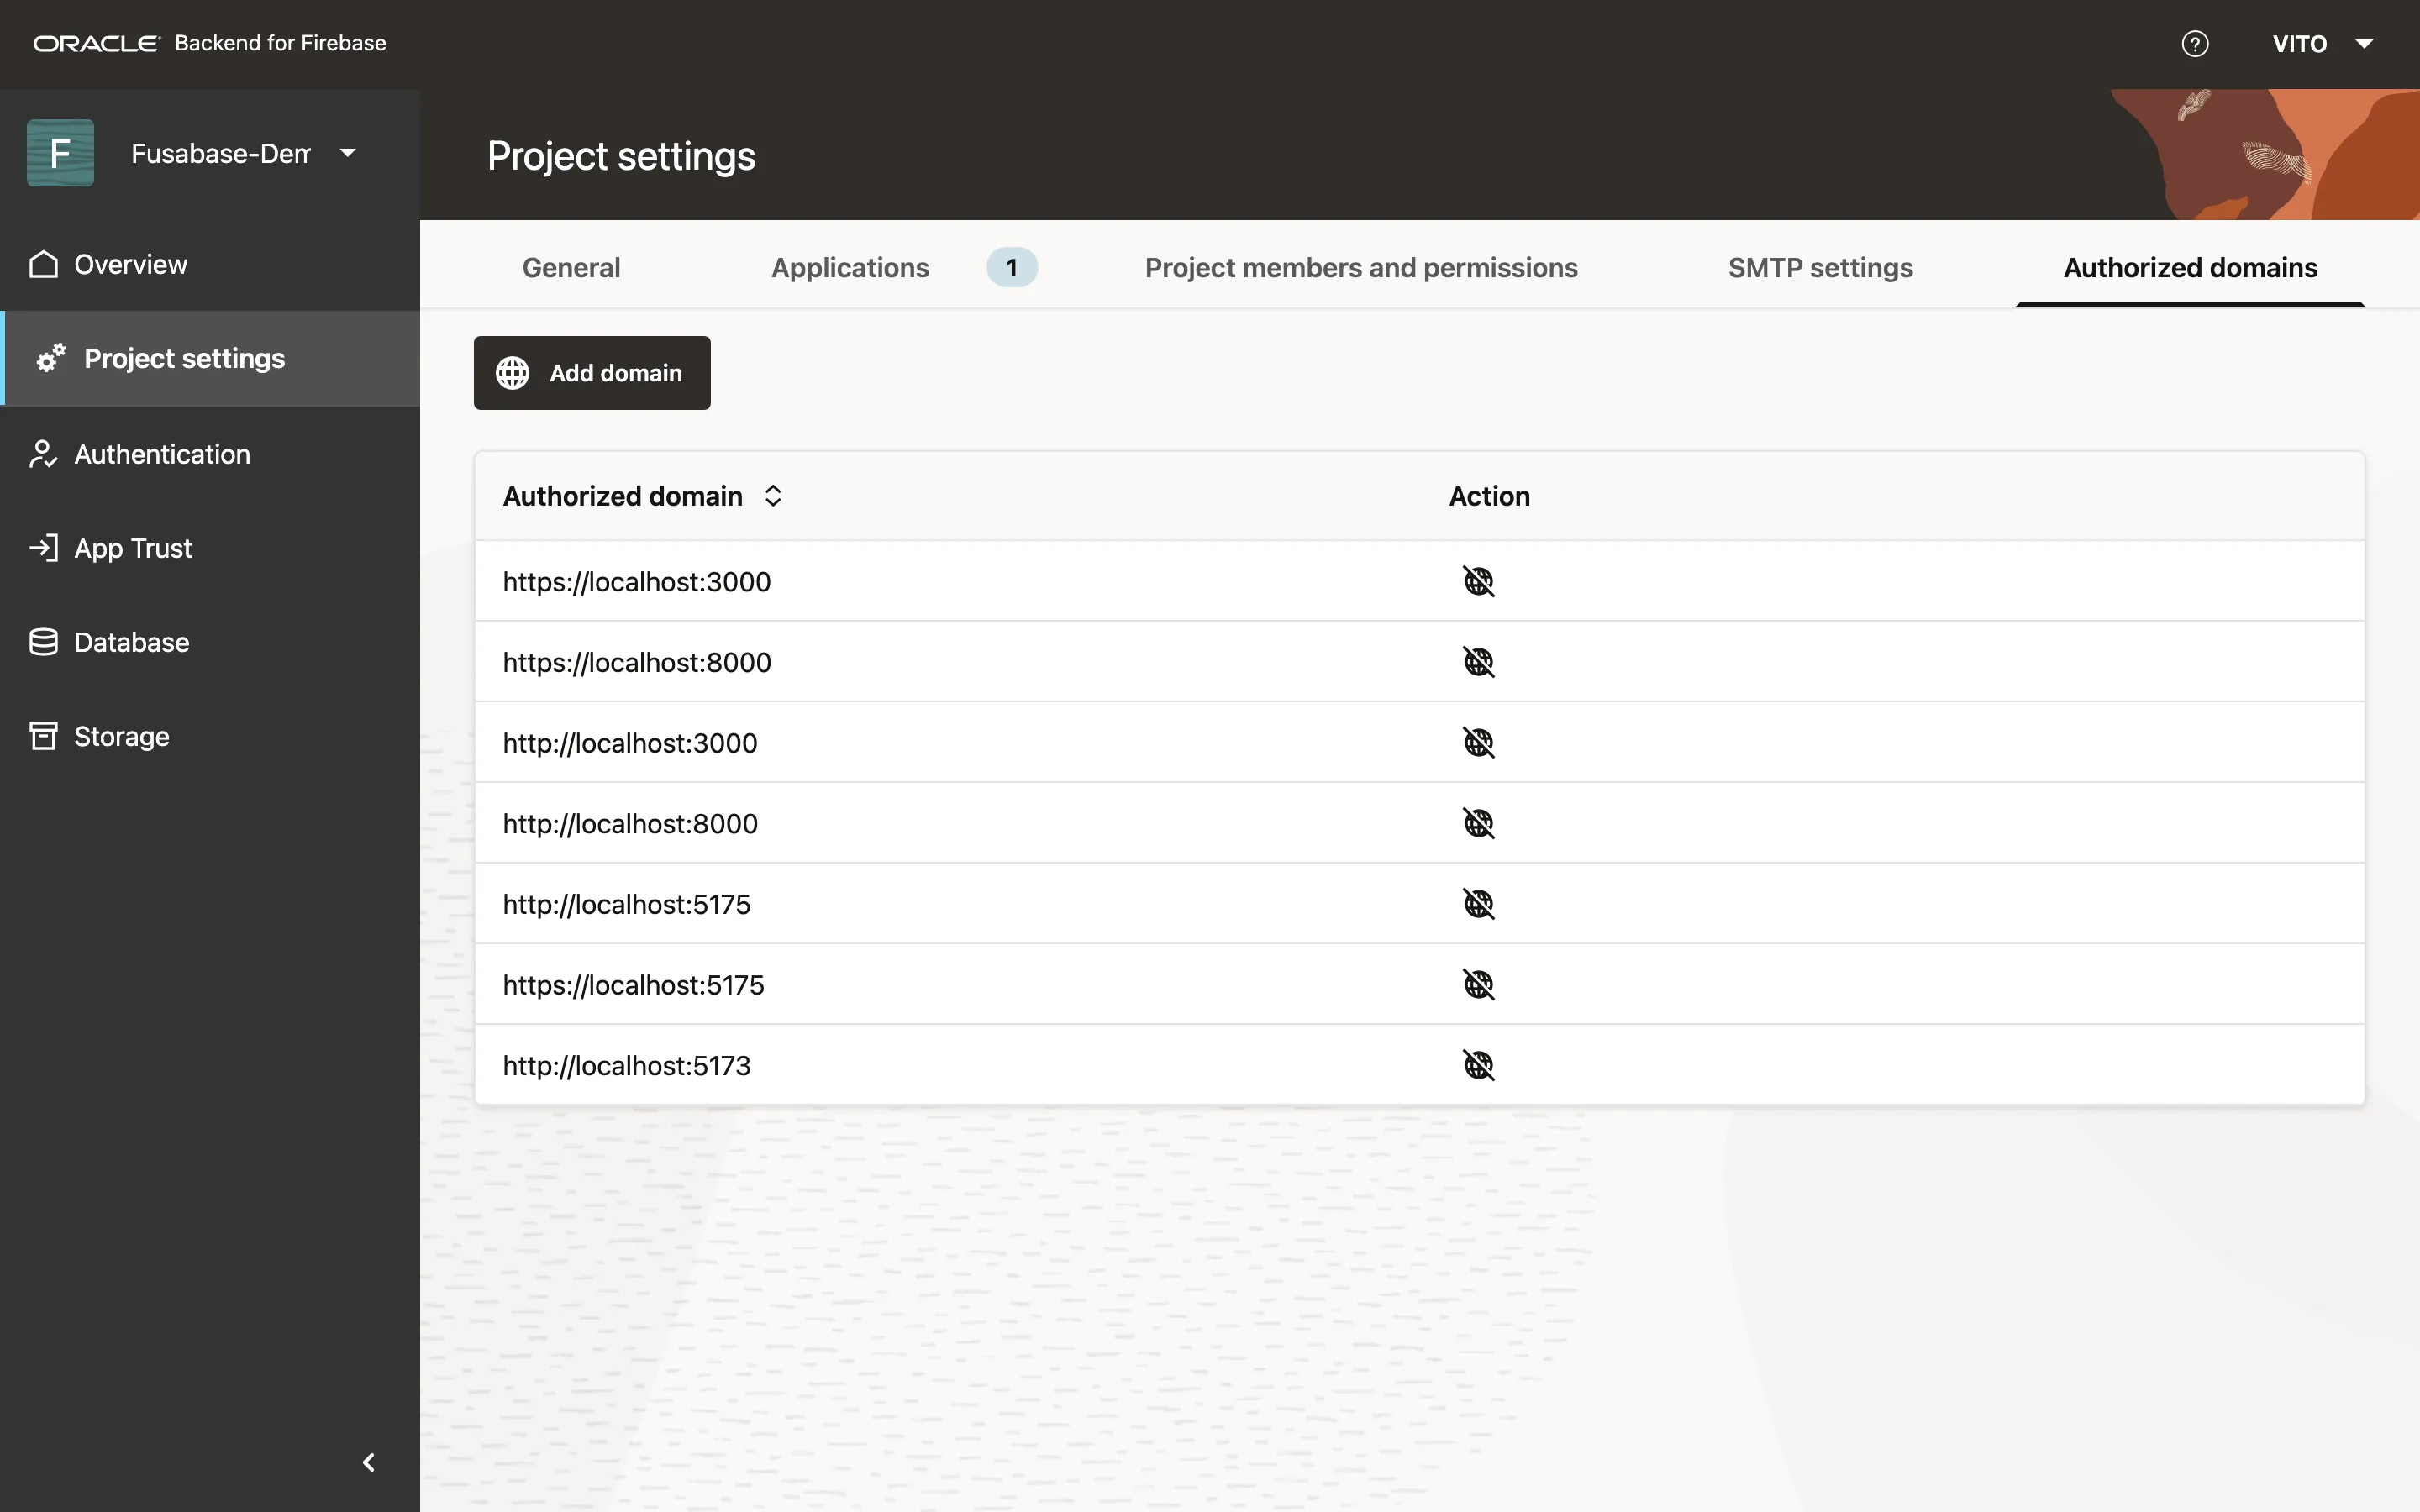
auth/network-error. The browser’s developer console blames CORS (the browser’s built-in rule that a page can only call back-ends that have explicitly approved its web address), and the server confirms it with error ORDS-13002: “the request Origin is not authorized to access this resource.” This is the first fail-closed wall: the sign-in calls only run from web addresses you’ve put on an allow-list, so a random website can’t copy your config (the fusabaseConfig object) and start signing users in against your backend. http://localhost:5173 isn’t on that list yet, so as far as the backend is concerned my local app is just another untrusted website.
The fix is in the Console under Project Settings → Authorized Domains:
And with that, sign-in works:
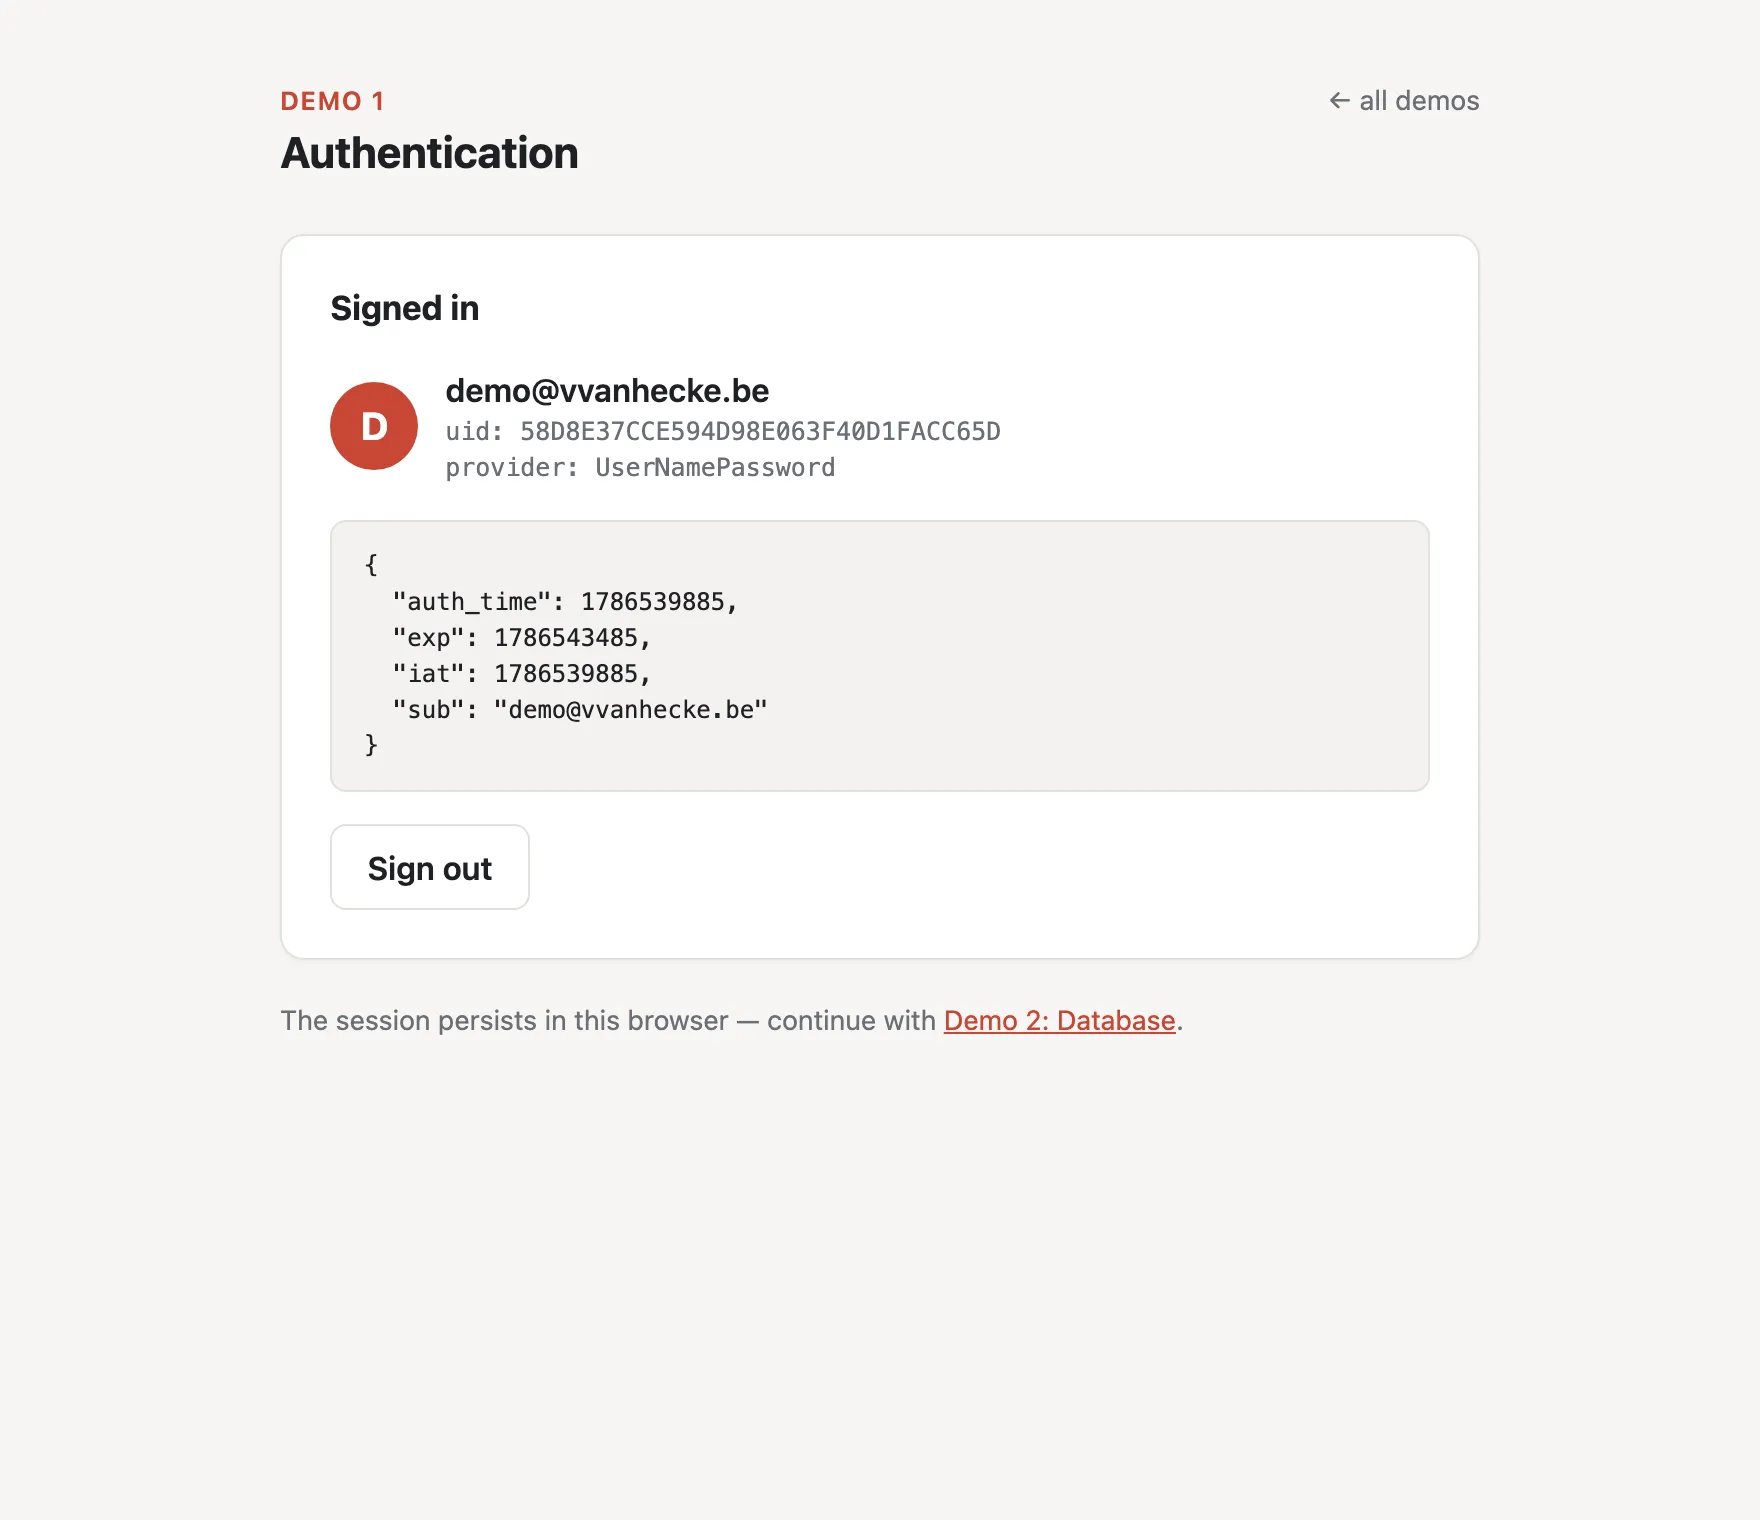
The panel at the bottom shows what’s inside the user’s sign-in token. That token is a JWT (JSON Web Token - a signed, tamper-proof bundle of JSON the backend hands back on login), and it carries a scope field spelling out exactly which services this user is allowed to reach:
"idp_type": "BASE",
"sub": "demo@vvanhecke.be",
"aud": "58D6470B91BF4302E063F40D1FAC8719",
"scope": "baas-database baas-auth baas-storage"
Back to the Console
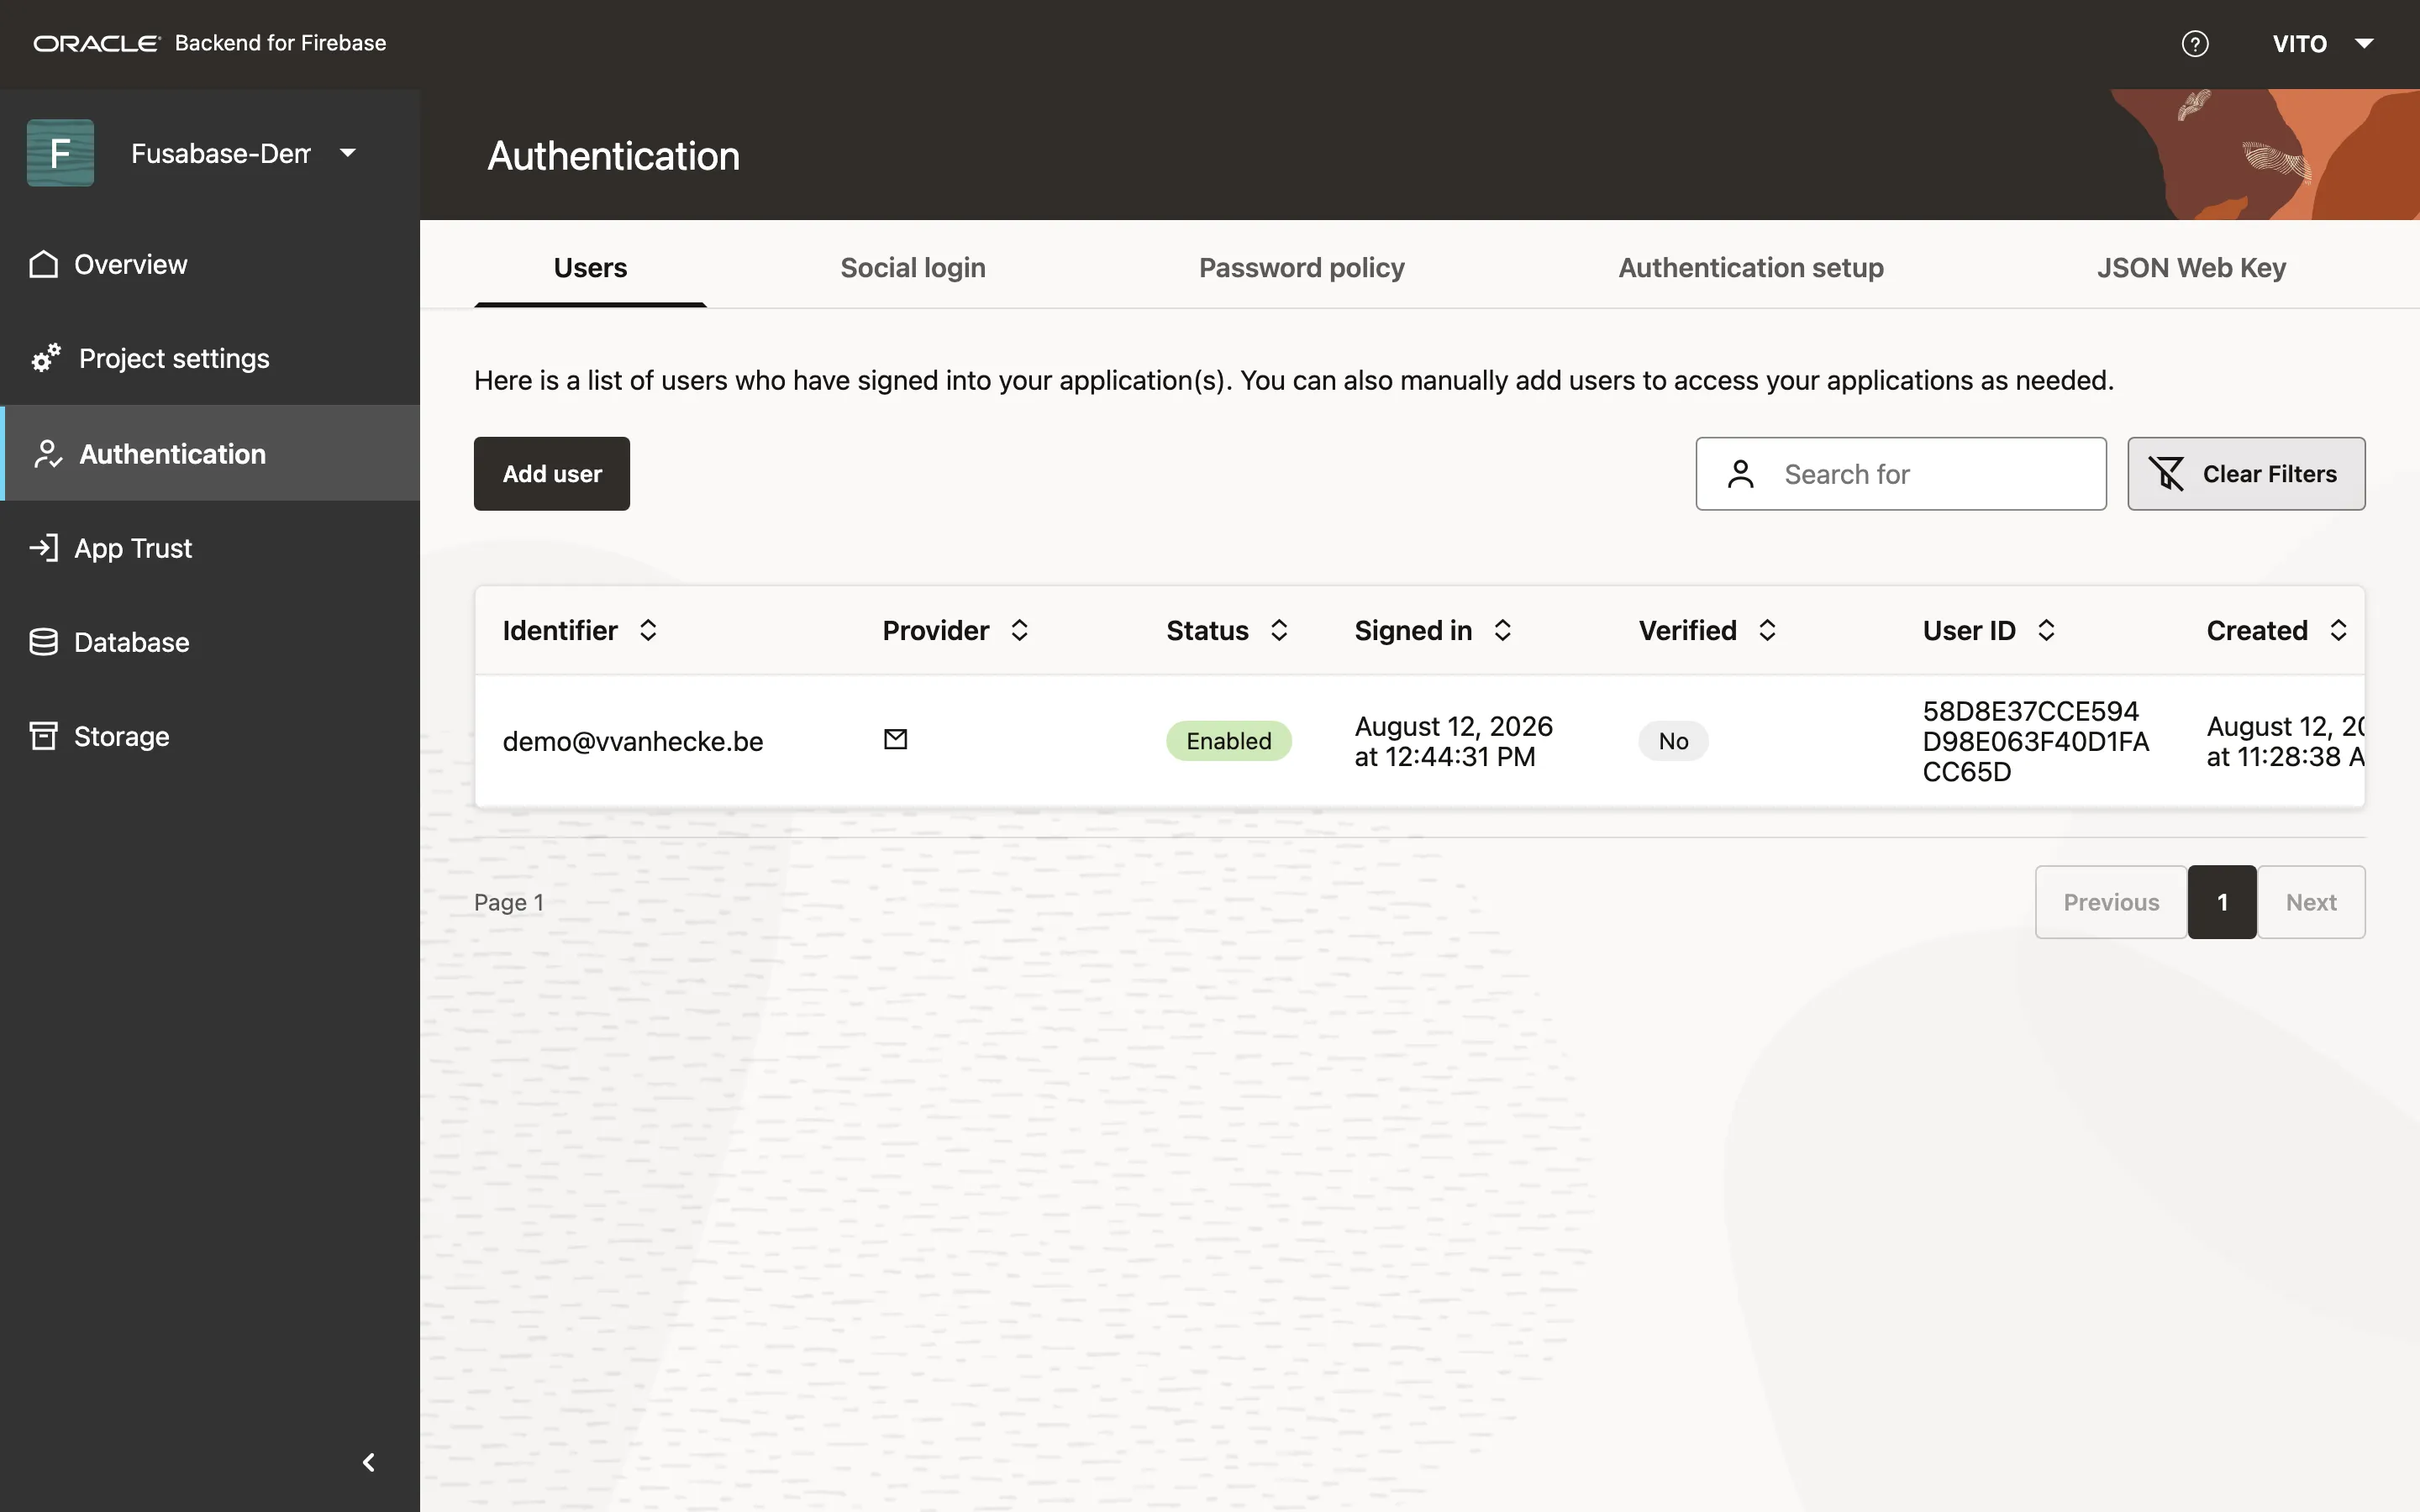
The user the demo created is now simply there, in Authentication → Users, next to whatever accounts sign in through Google:
Demo 2: Database
Use it in the app
The database is using JSON as it’s main data structure, everything database related, is JSON. The general idea is the following: You have collections that hold documents that have fields that can be numbers, strings, booleans, dates…
Here we will create our todos collection:
import {
  getOracledb,
  collection,
  doc,
  addDoc,
  updateDoc,
  deleteDoc,
  getDocs,
  query,
  where,
  orderBy
} from "fusabase/oracledb";

const db = getOracledb(app);
const todos = collection(db, "todos");

// create
await addDoc(todos, {
  uid: user.uid,
  title: "Write part 2 of the blog series",
  done: false,
  createdAt: Date.now(),
});

// read: only my todos, newest first
const snaps = await getDocs(
  query(todos, where("uid", "==", user.uid), orderBy("createdAt", "desc"))
);

// update & delete work on a document reference
await updateDoc(doc(db, "todos", id), { done: true });
await deleteDoc(doc(db, "todos", id));
On the Oracle side these are JSON collections in the project-owner schema - writing to a path creates the collection if it doesn’t exist. So let’s add our first todo:
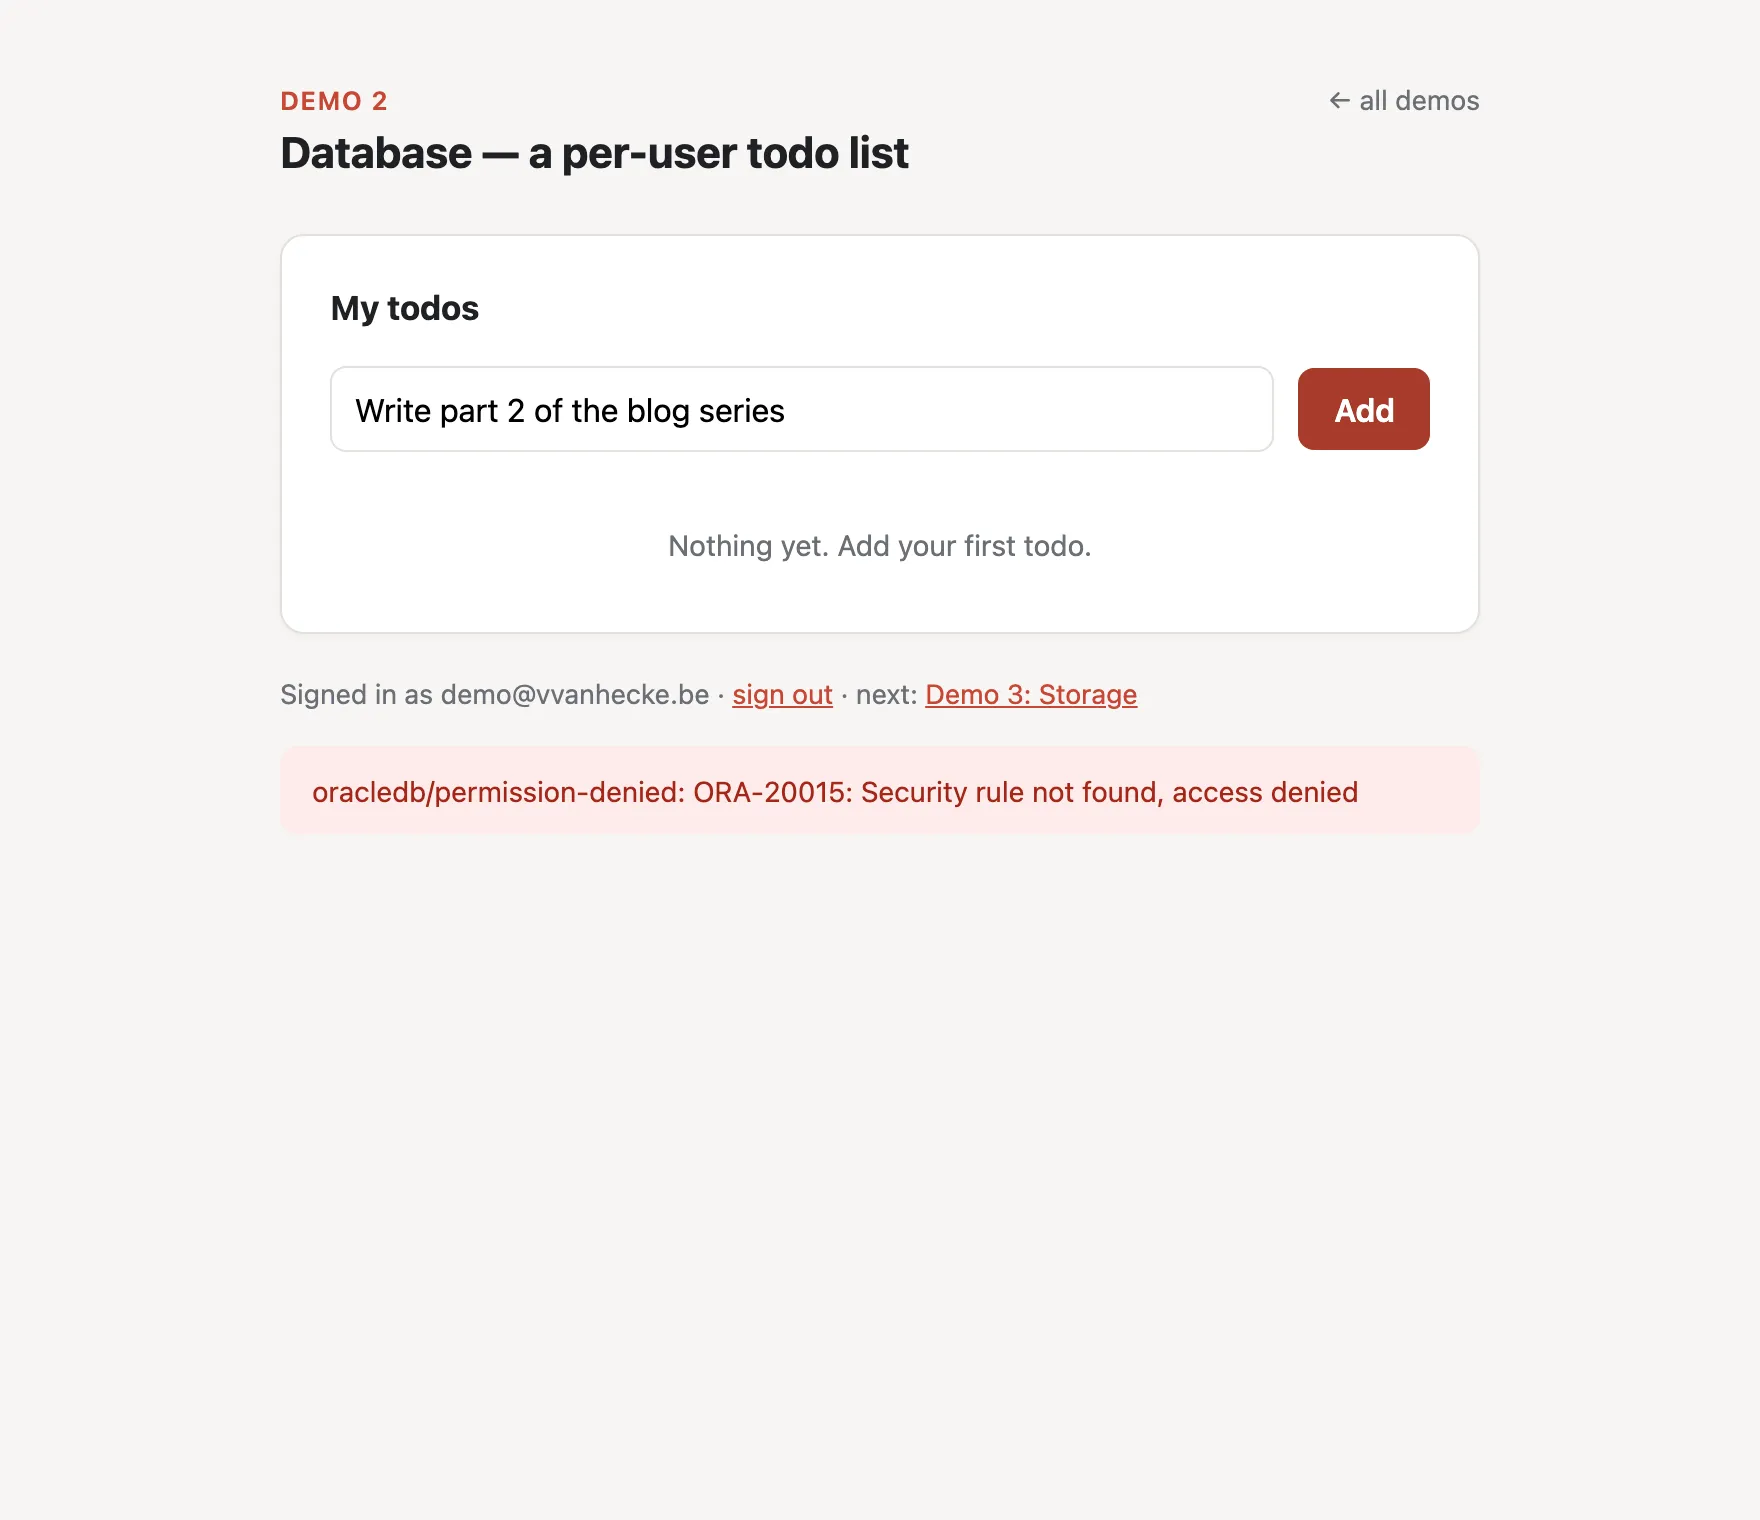
ORA-20015: Security rule not found, access denied. Wall number two, and it’s the same philosophy as the first one: no rule means denied. There is no “test mode” that leaves your data open to the world until you get around to securing it.
Configure it in the Console
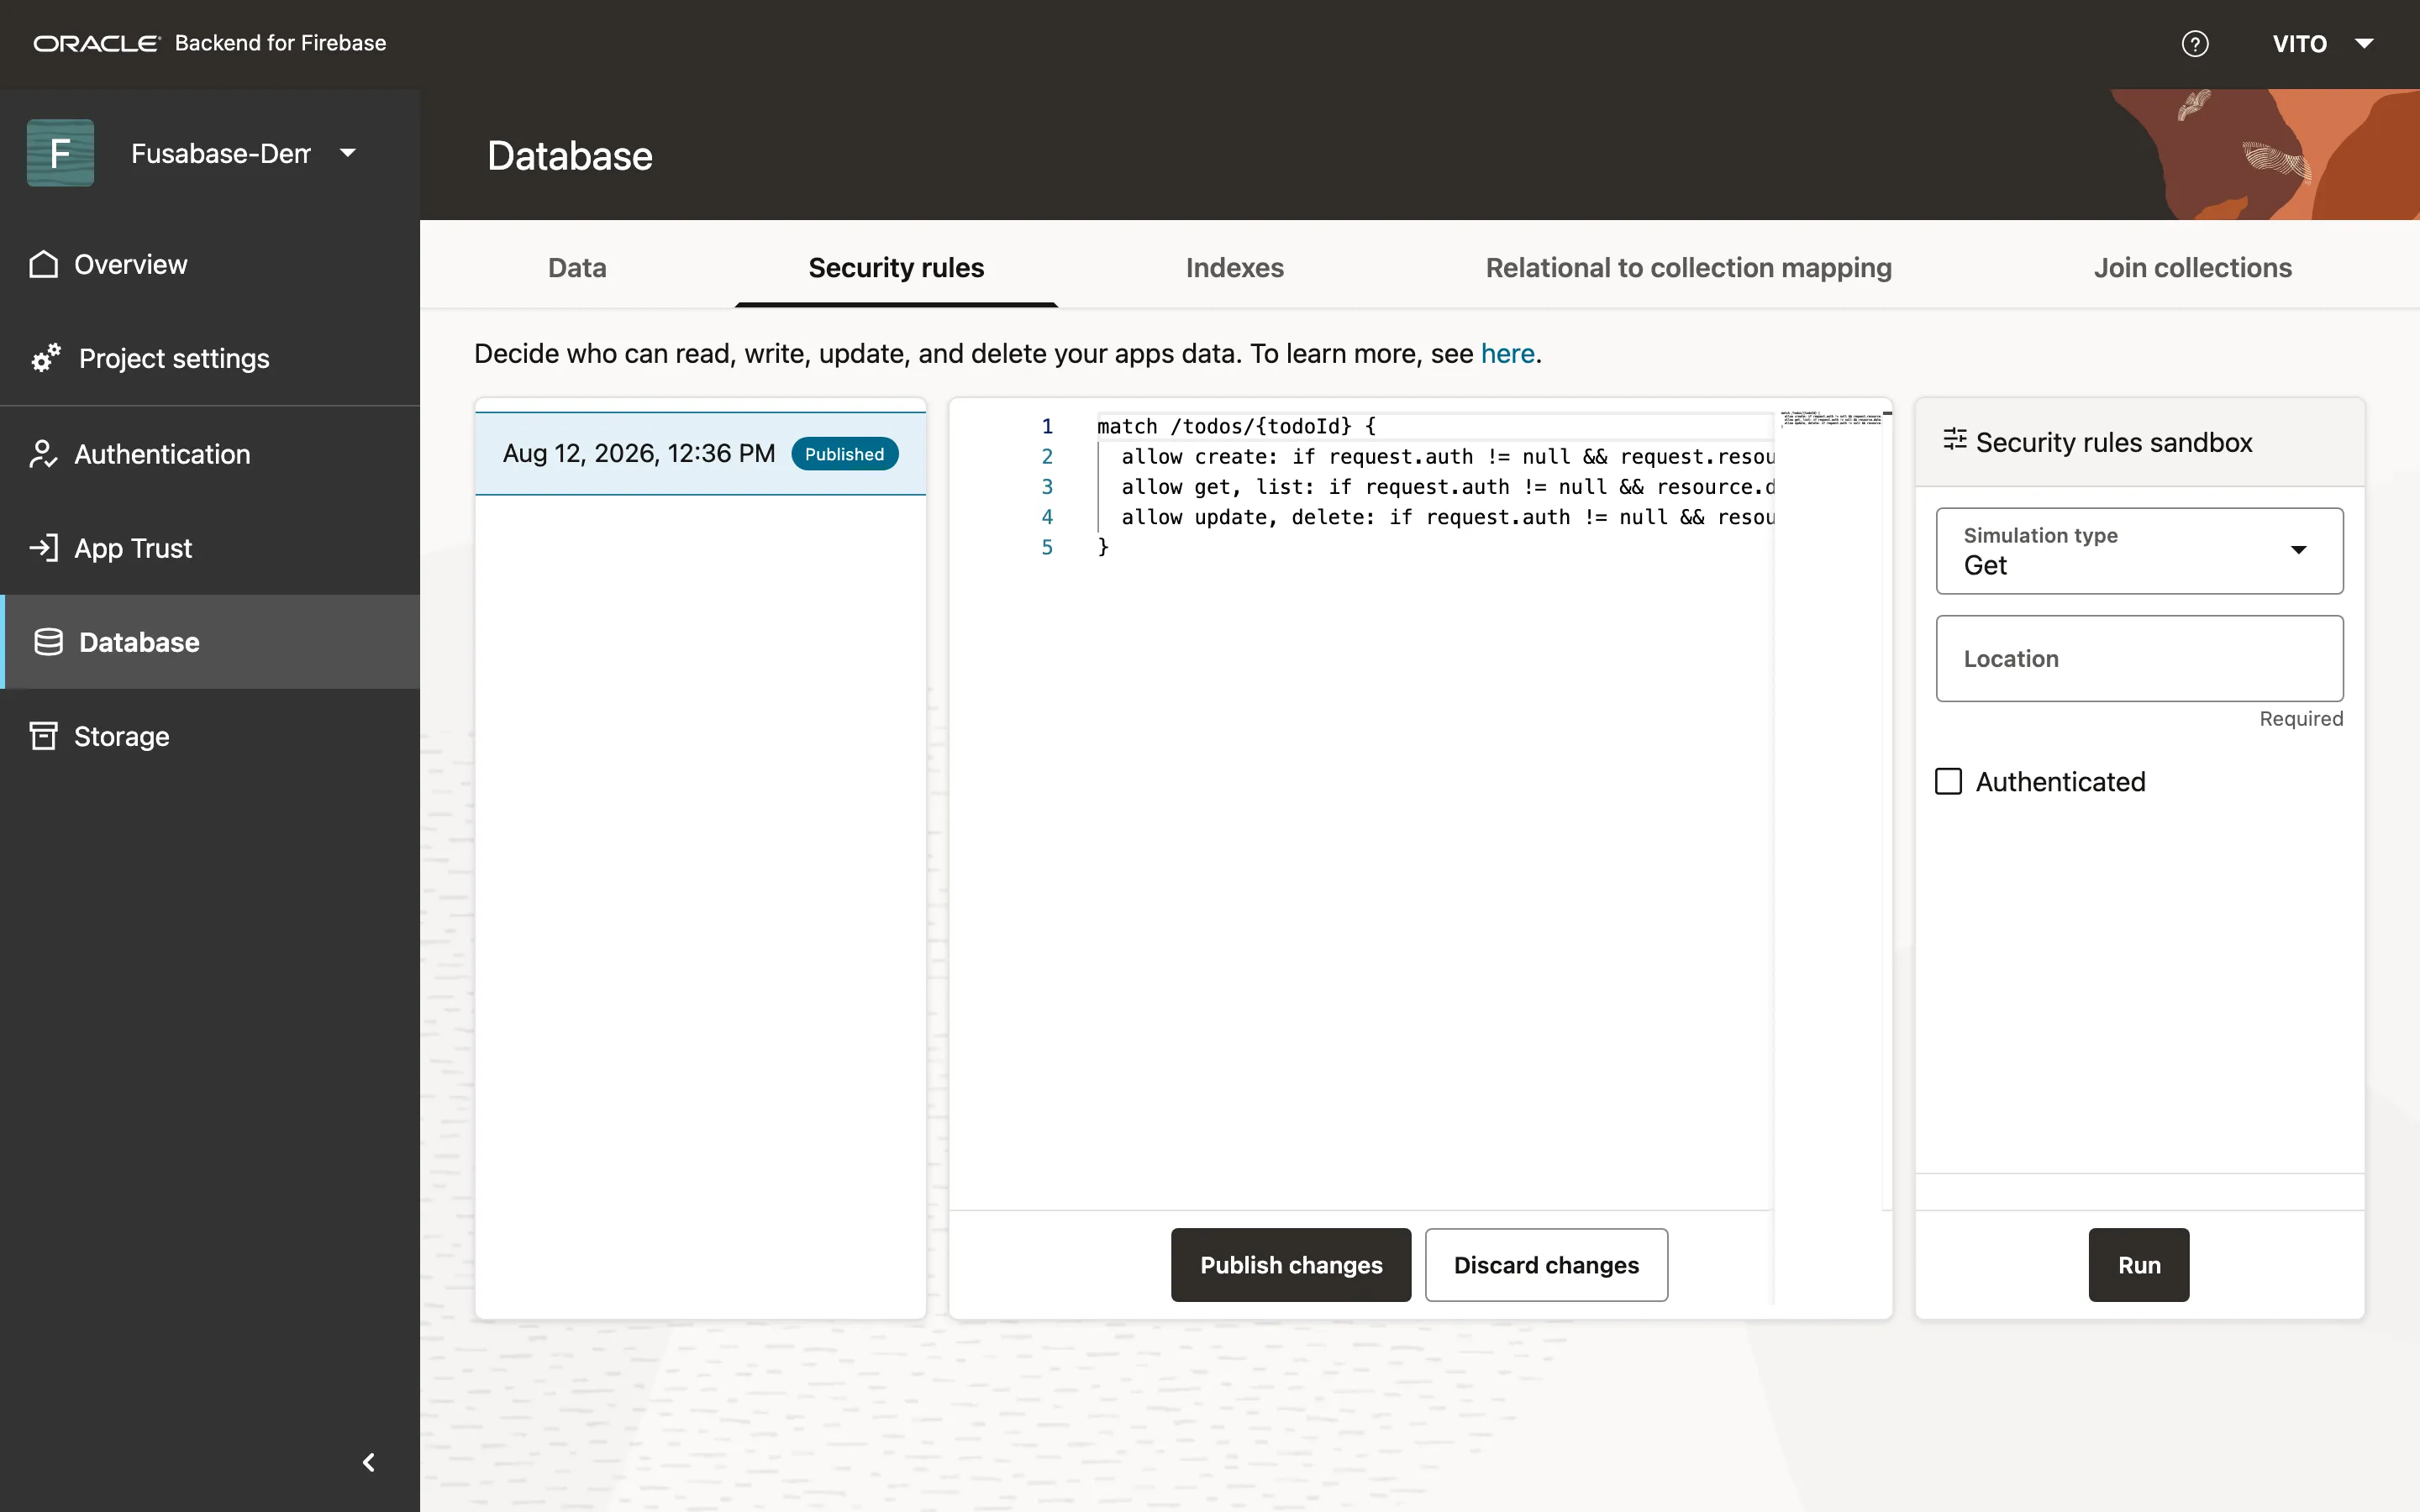
Security rules are small if-style conditions - written in a little rule language called CEL (Common Expression Language, the same one Firebase uses) - and the backend runs the matching one on every single request. Here’s the whole rule set for the todo list (rules/database.rules in the repo):
match /todos/{todoId} {
  // Anyone signed in may create a todo, but only as themselves.
  allow create: if request.auth != null
                && request.resource.data.uid == request.auth.uid;

  // You can only see and change your own todos.
  allow get, list:      if request.auth != null
                        && resource.data.uid == request.auth.uid;
  allow update, delete: if request.auth != null
                        && resource.data.uid == request.auth.uid;
}
The vocabulary: methods are get, list, create, update and delete, request.auth is the verified token, request.resource.data is the incoming document and resource.data the stored one. Note the asymmetry - create checks the incoming uid, the others check the stored one. That’s what makes “you can only create todos as yourself” and “you can only touch your own todos” two different guarantees.
The Console has a rules editor with validation and a simulator, so you can test a rule against a sample request before publishing it:
Coming from APEX, the key mental shift: this is not Oracle’s Virtual Private Database (VPD, the row-level security you bolt onto tables in the database) and it’s not database roles or grants. It’s evaluated per request and compares the incoming request against the stored row - much closer to a WHERE clause you write once than to a permanent grant.
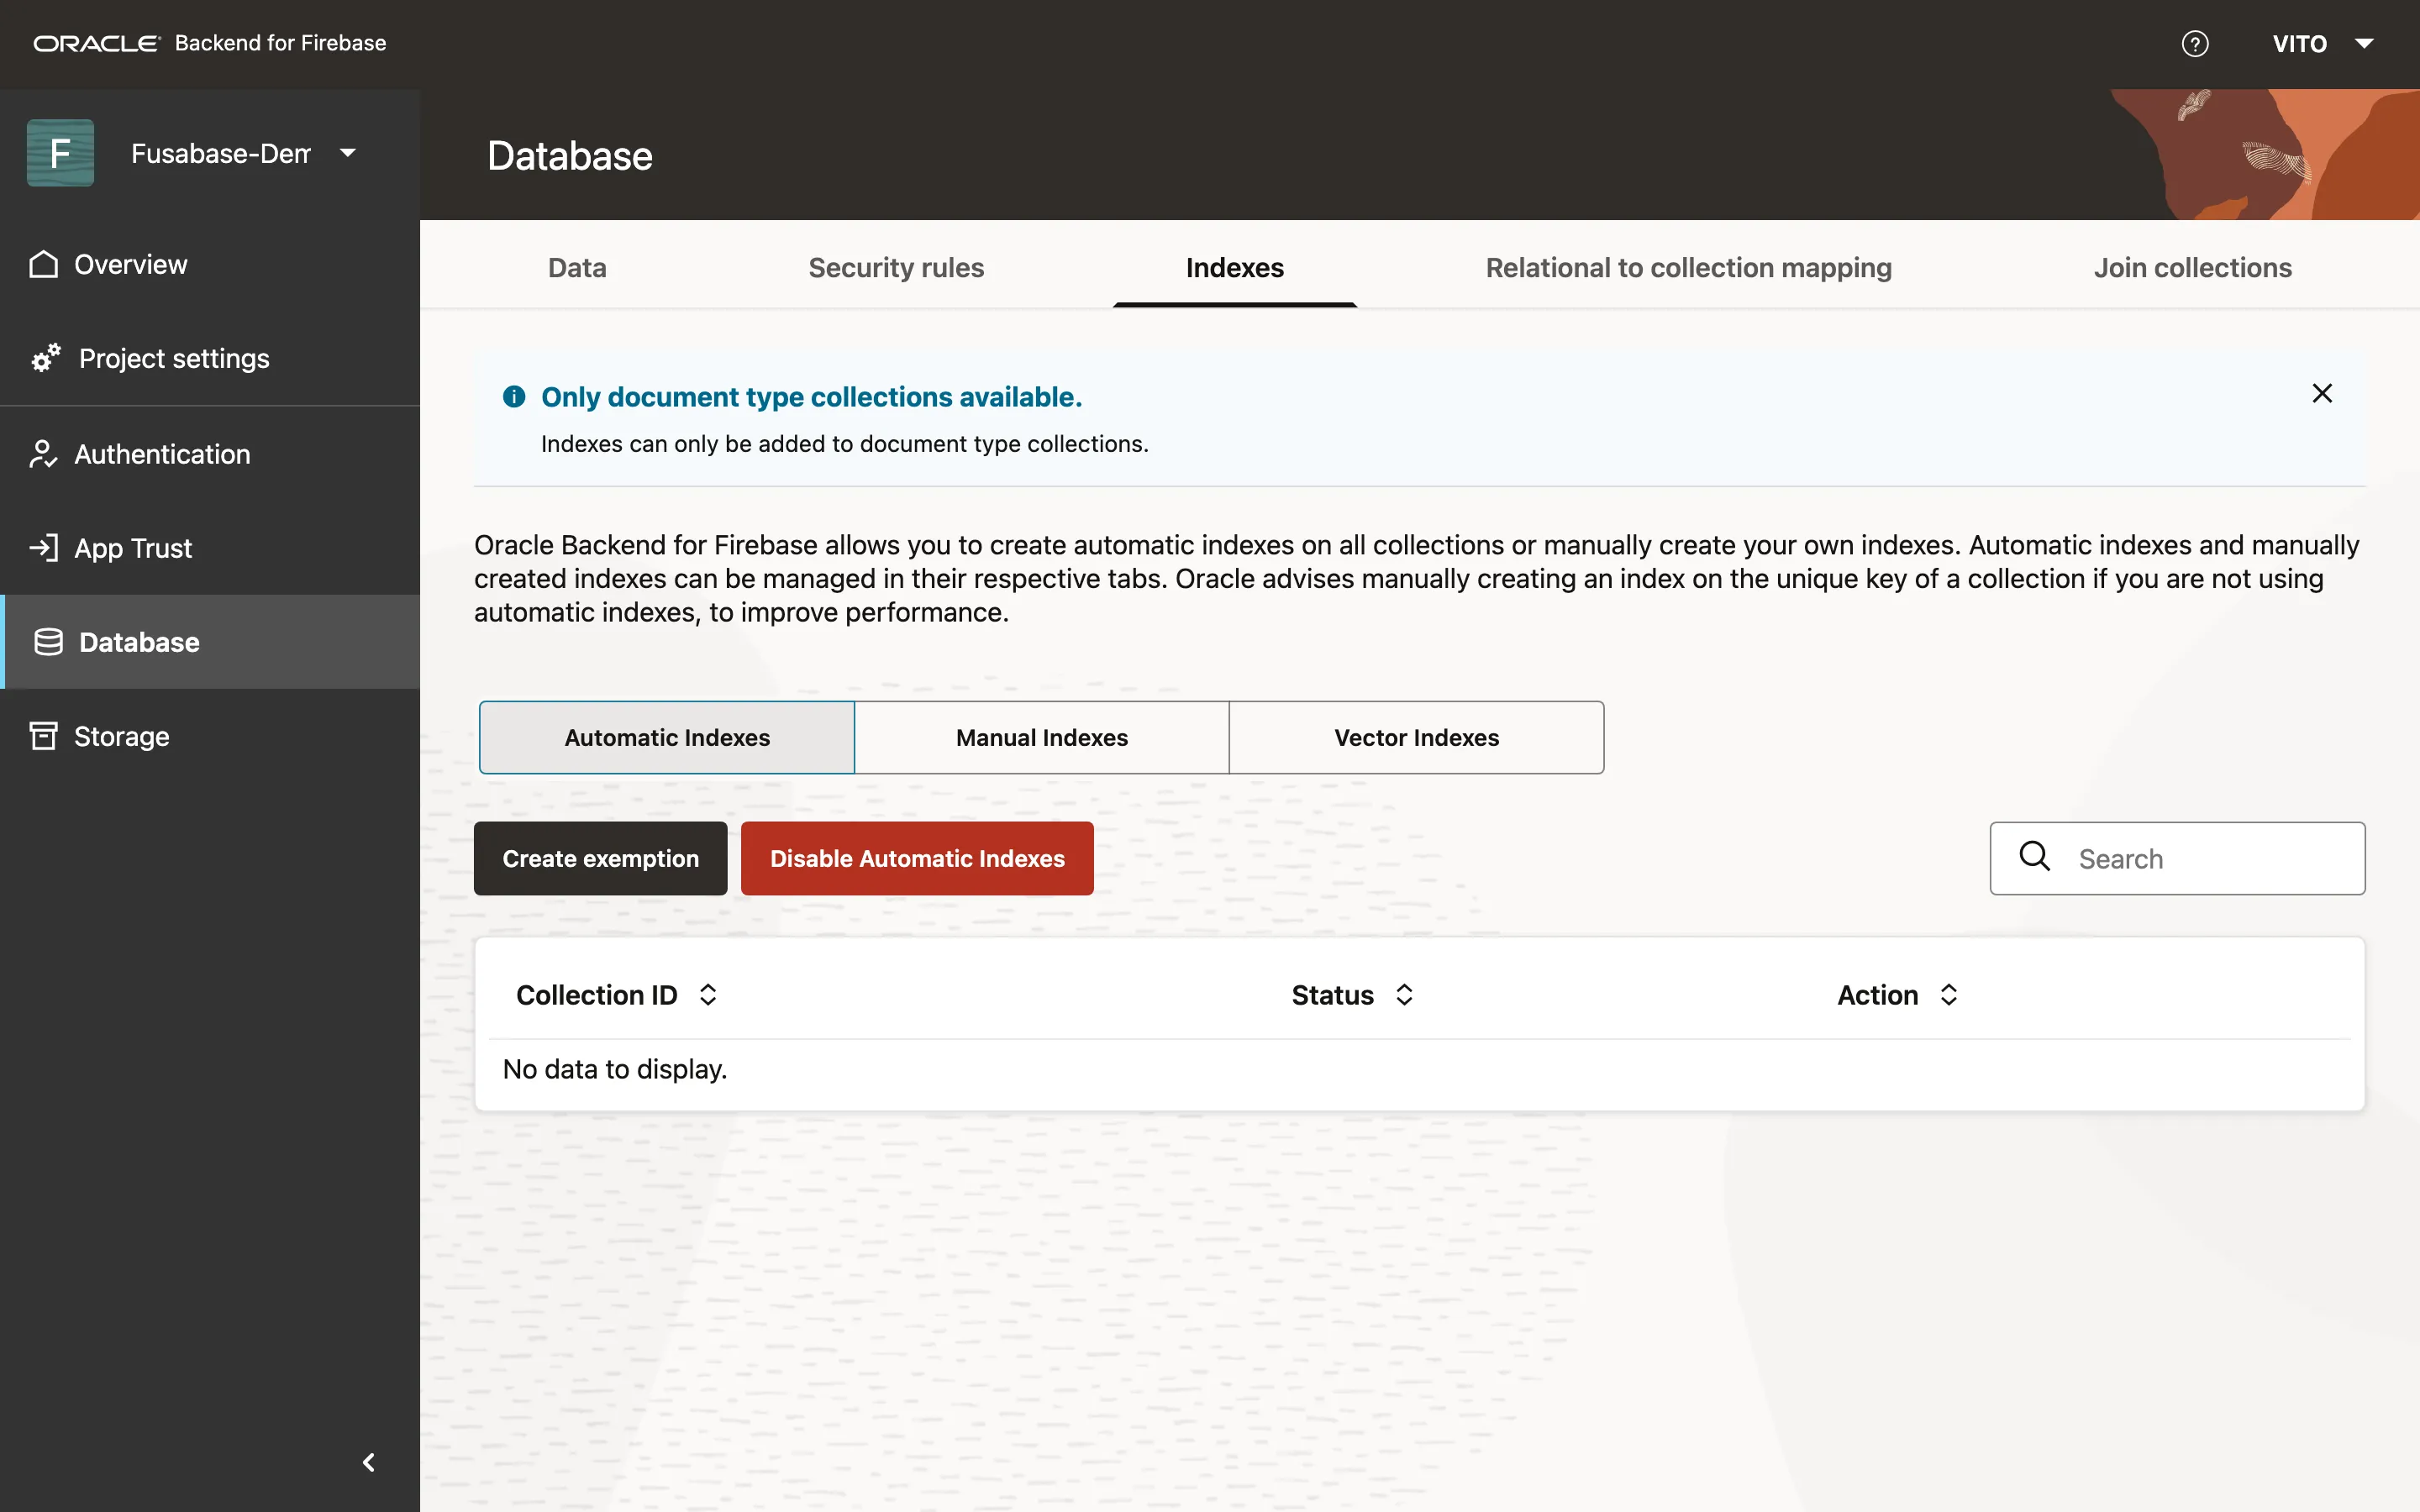
There’s a second piece of configuration worth doing while we’re here: indexes (the lookup structures a database uses to find rows fast). Our query combines where('uid', '==', …) with orderBy('createdAt', 'desc'). On my tiny demo collection it ran fine without one, but Oracle’s advice is not to rely on that - either create an index by hand on the fields you query, or flip on automatic indexes, which build and maintain them for you. More complex queries (ones that search across many collections at once, or stitch collections together) need a hand-made index outright. I turned automatic indexes on:
And now it works
Rules published:
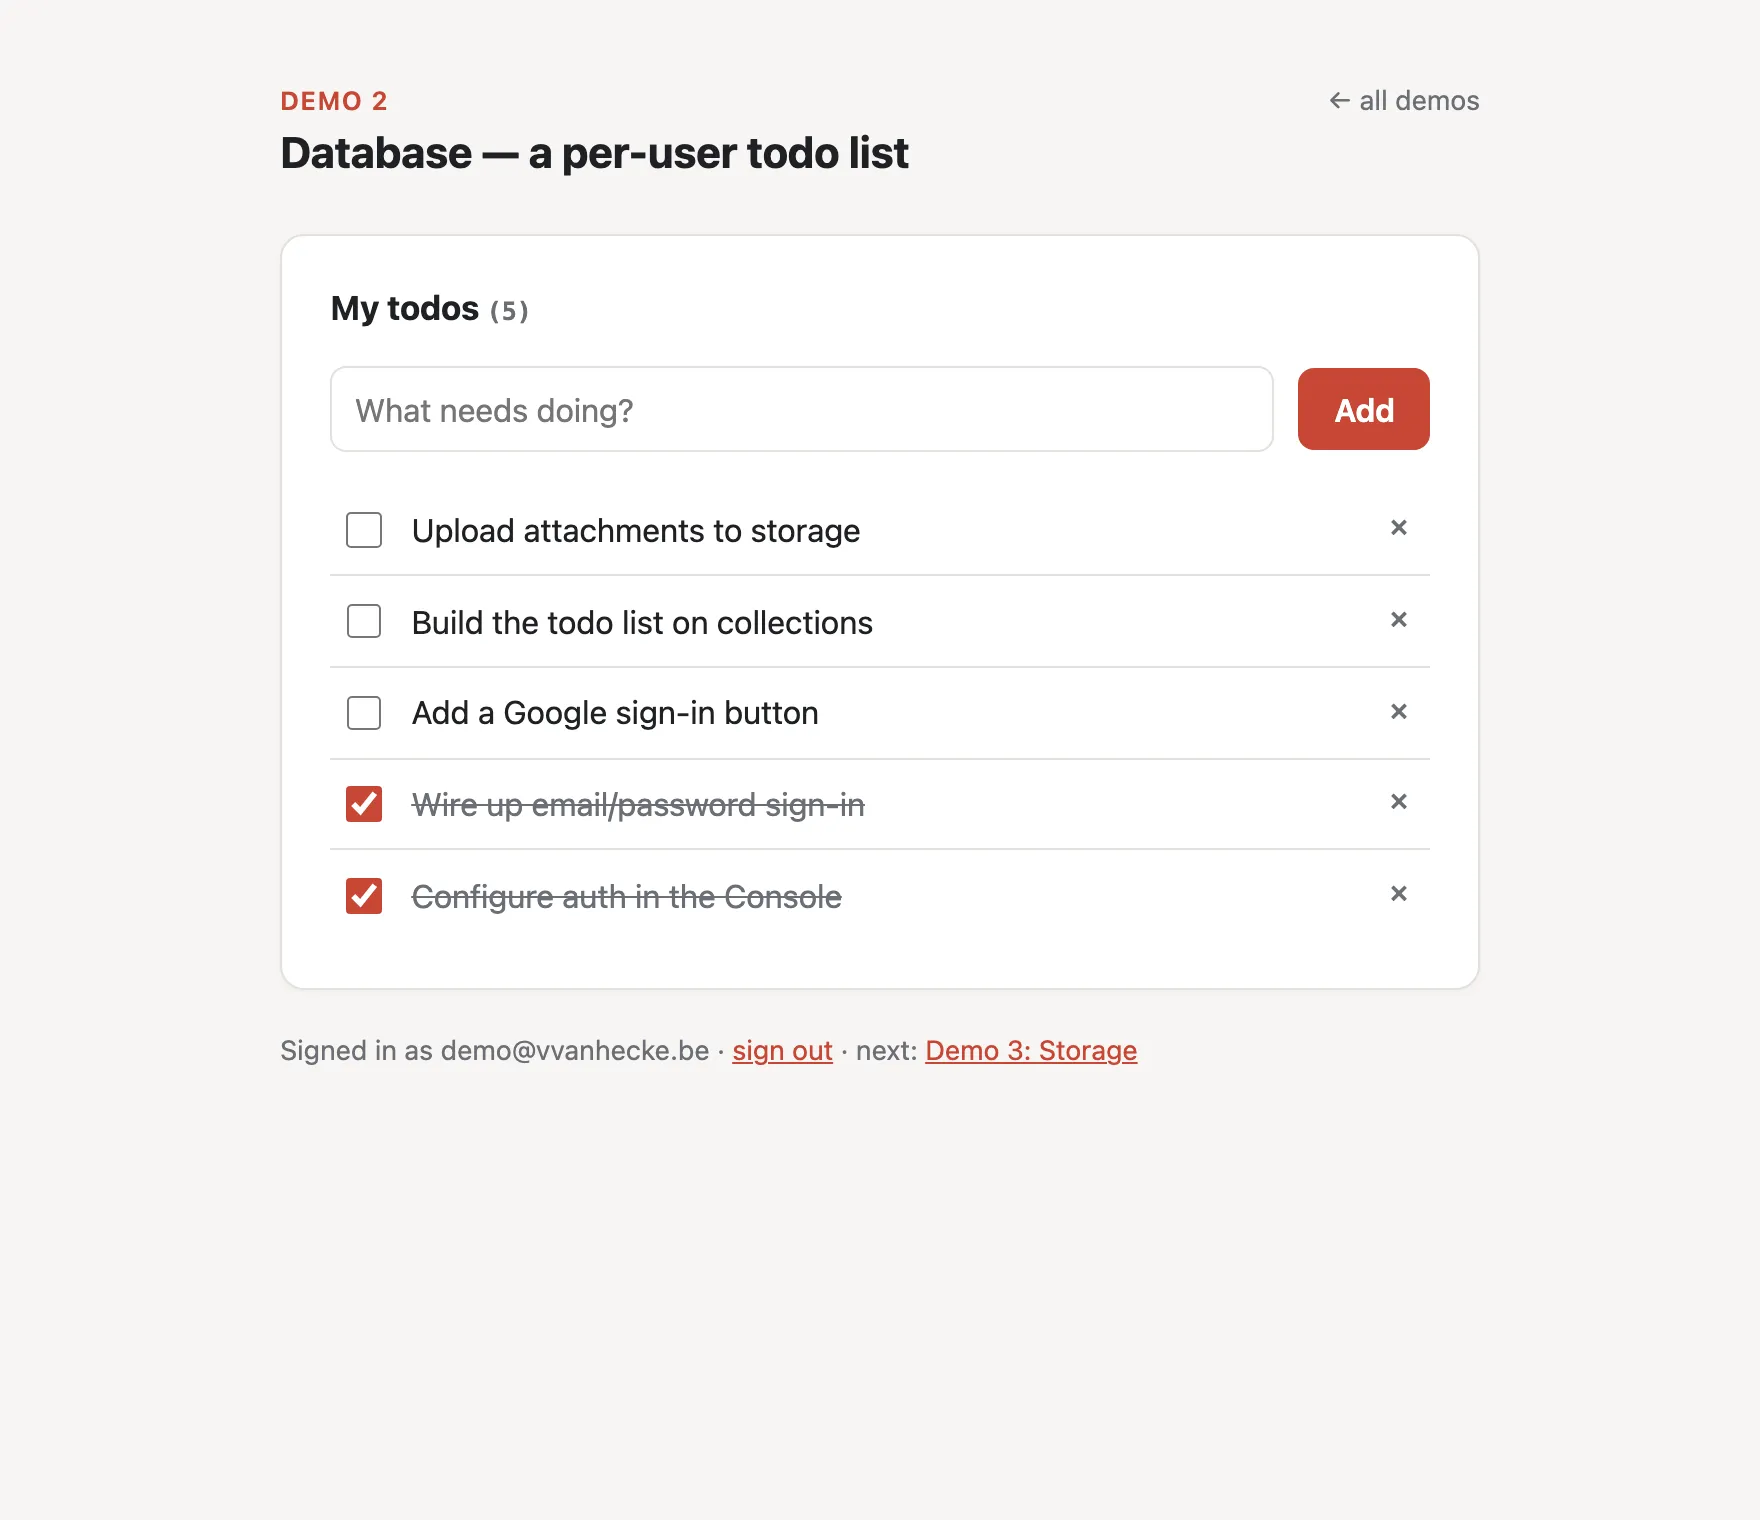
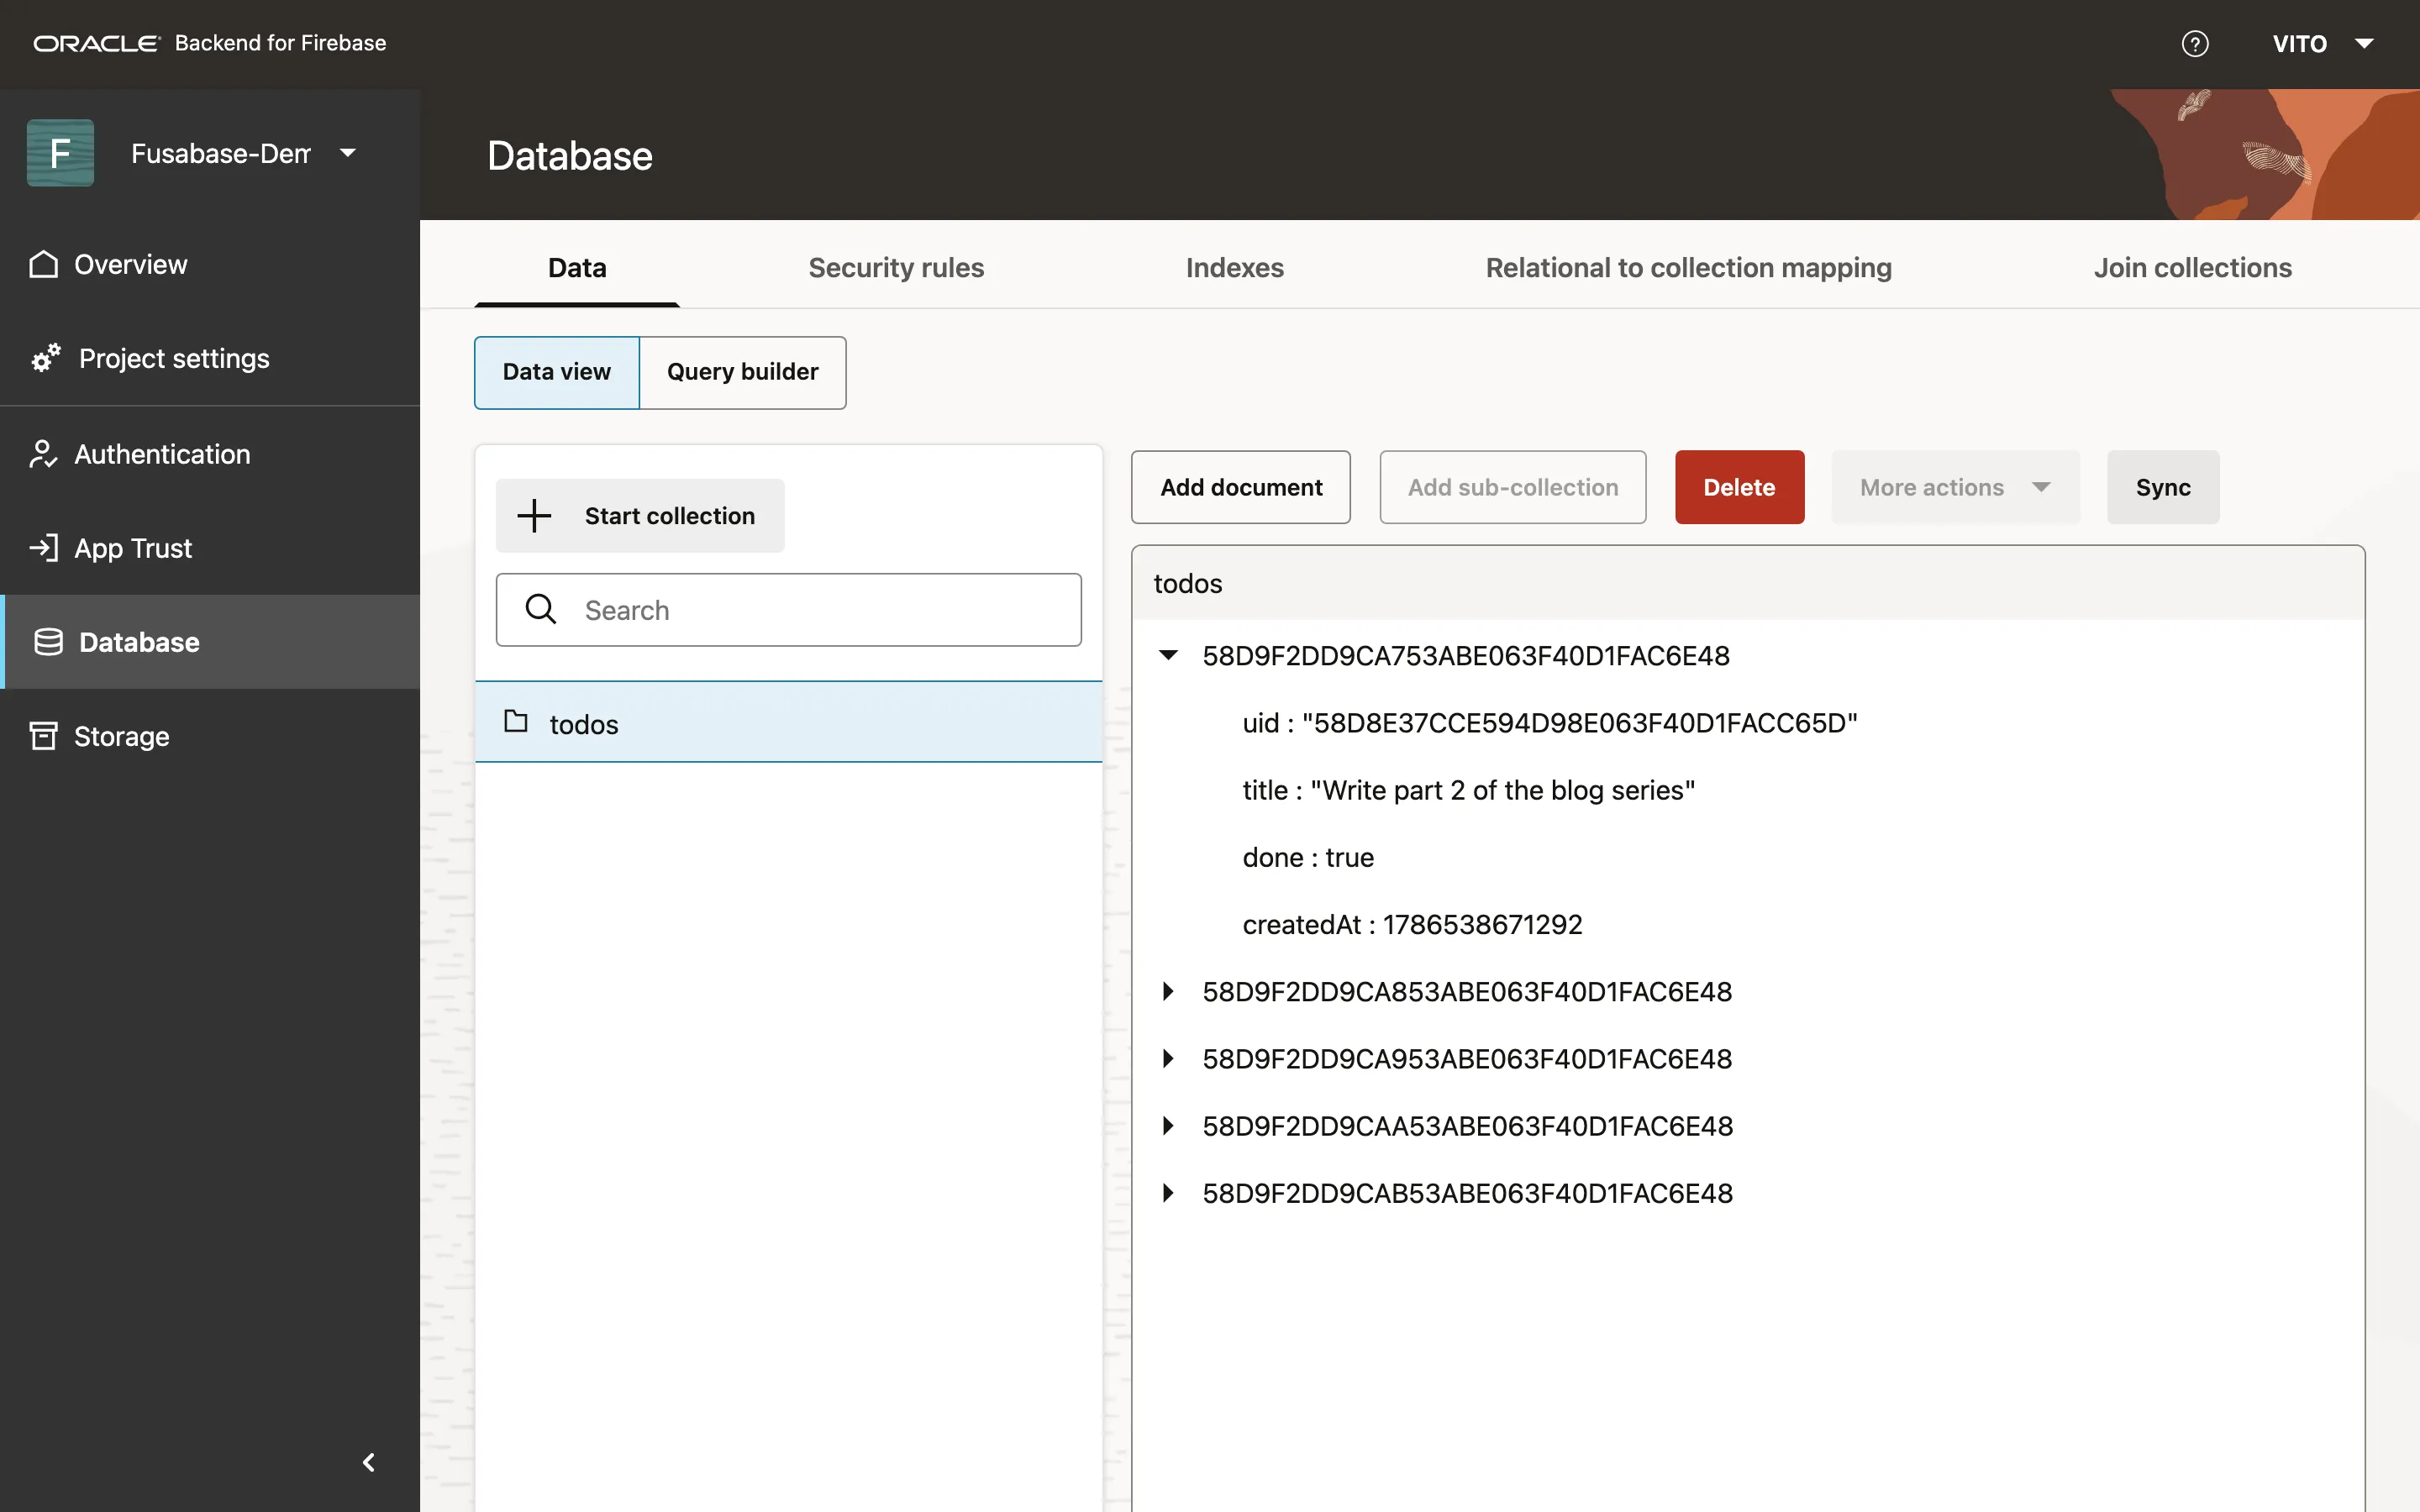
Back in the Console, the todos collection appeared the moment the first addDoc succeeded, and the documents are sitting there as JSON - which you can also query with plain SQL from the same schema your APEX app lives in:
Two features I’m holding back: onSnapshot live listeners get their own demo below, and making your existing relational tables show up as document collections (through a 26ai feature called JSON duality views, which exposes ordinary tables as JSON documents and writes changes back to the tables) - the thing that makes this genuinely interesting for an Oracle shop with twenty years of tables - deserves a post of its own.
Demo 3: Storage
Use it in the app
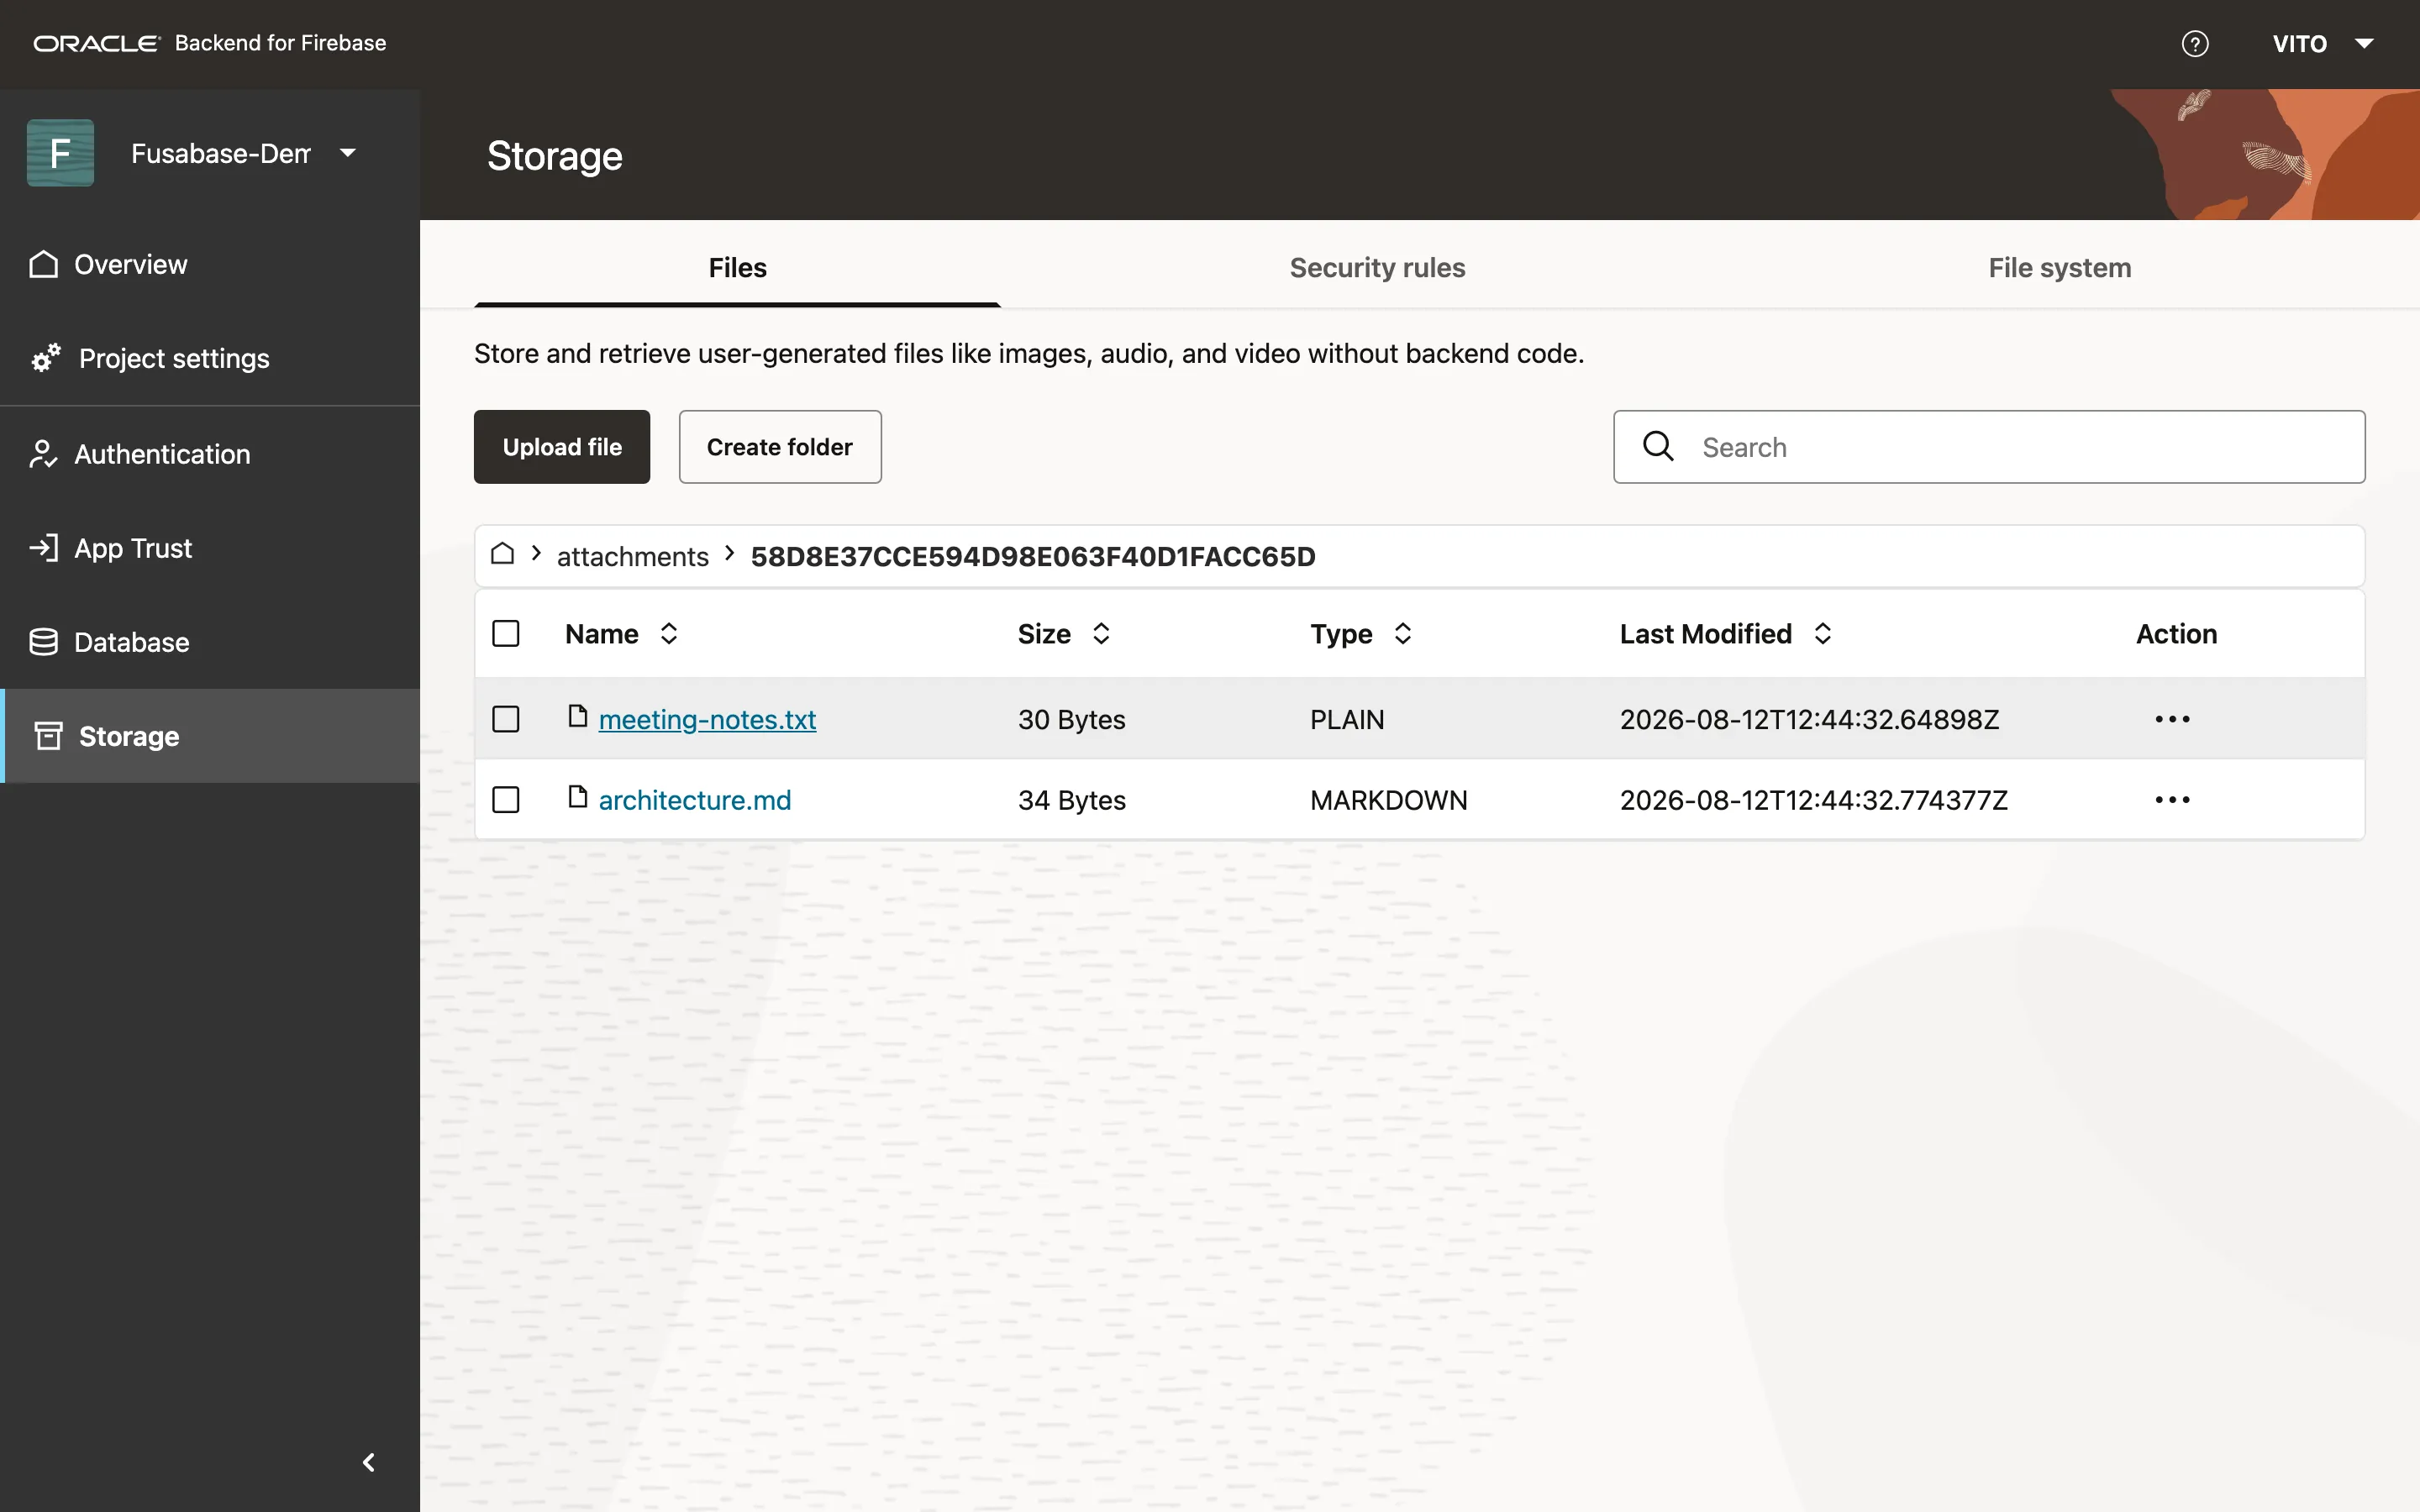
Storage here uses DBFS (Database File System) - the uploaded files literally live inside the Oracle database. On top of that sits the same file-handling API Firebase gives you. Our todo app gives each user a private attachments folder:
import {
  getStorage,
  ref,
  uploadBytesResumable,
  getDownloadURL,
  listAll,
  deleteObject
} from "fusabase/storage";

const storage = getStorage(app);
const fileRef = ref(storage, `attachments/${user.uid}/${file.name}`);

const task = uploadBytesResumable(fileRef, file, { contentType: file.type });
task.on("state_changed",
  (snap) => console.log(`${(snap.bytesTransferred / snap.totalBytes * 100).toFixed(0)}%`),
  (err) => console.error(err),
  async () => console.log("done:", await getDownloadURL(task.snapshot.ref))
);

// list a user's folder and clean up
const { items } = await listAll(ref(storage, `attachments/${user.uid}`));
await deleteObject(items[0]);
One small gotcha from building this: don’t put a trailing slash on folder paths - ref(storage, 'attachments/uid/') fails client-side with “Invalid child path” before any request is made.
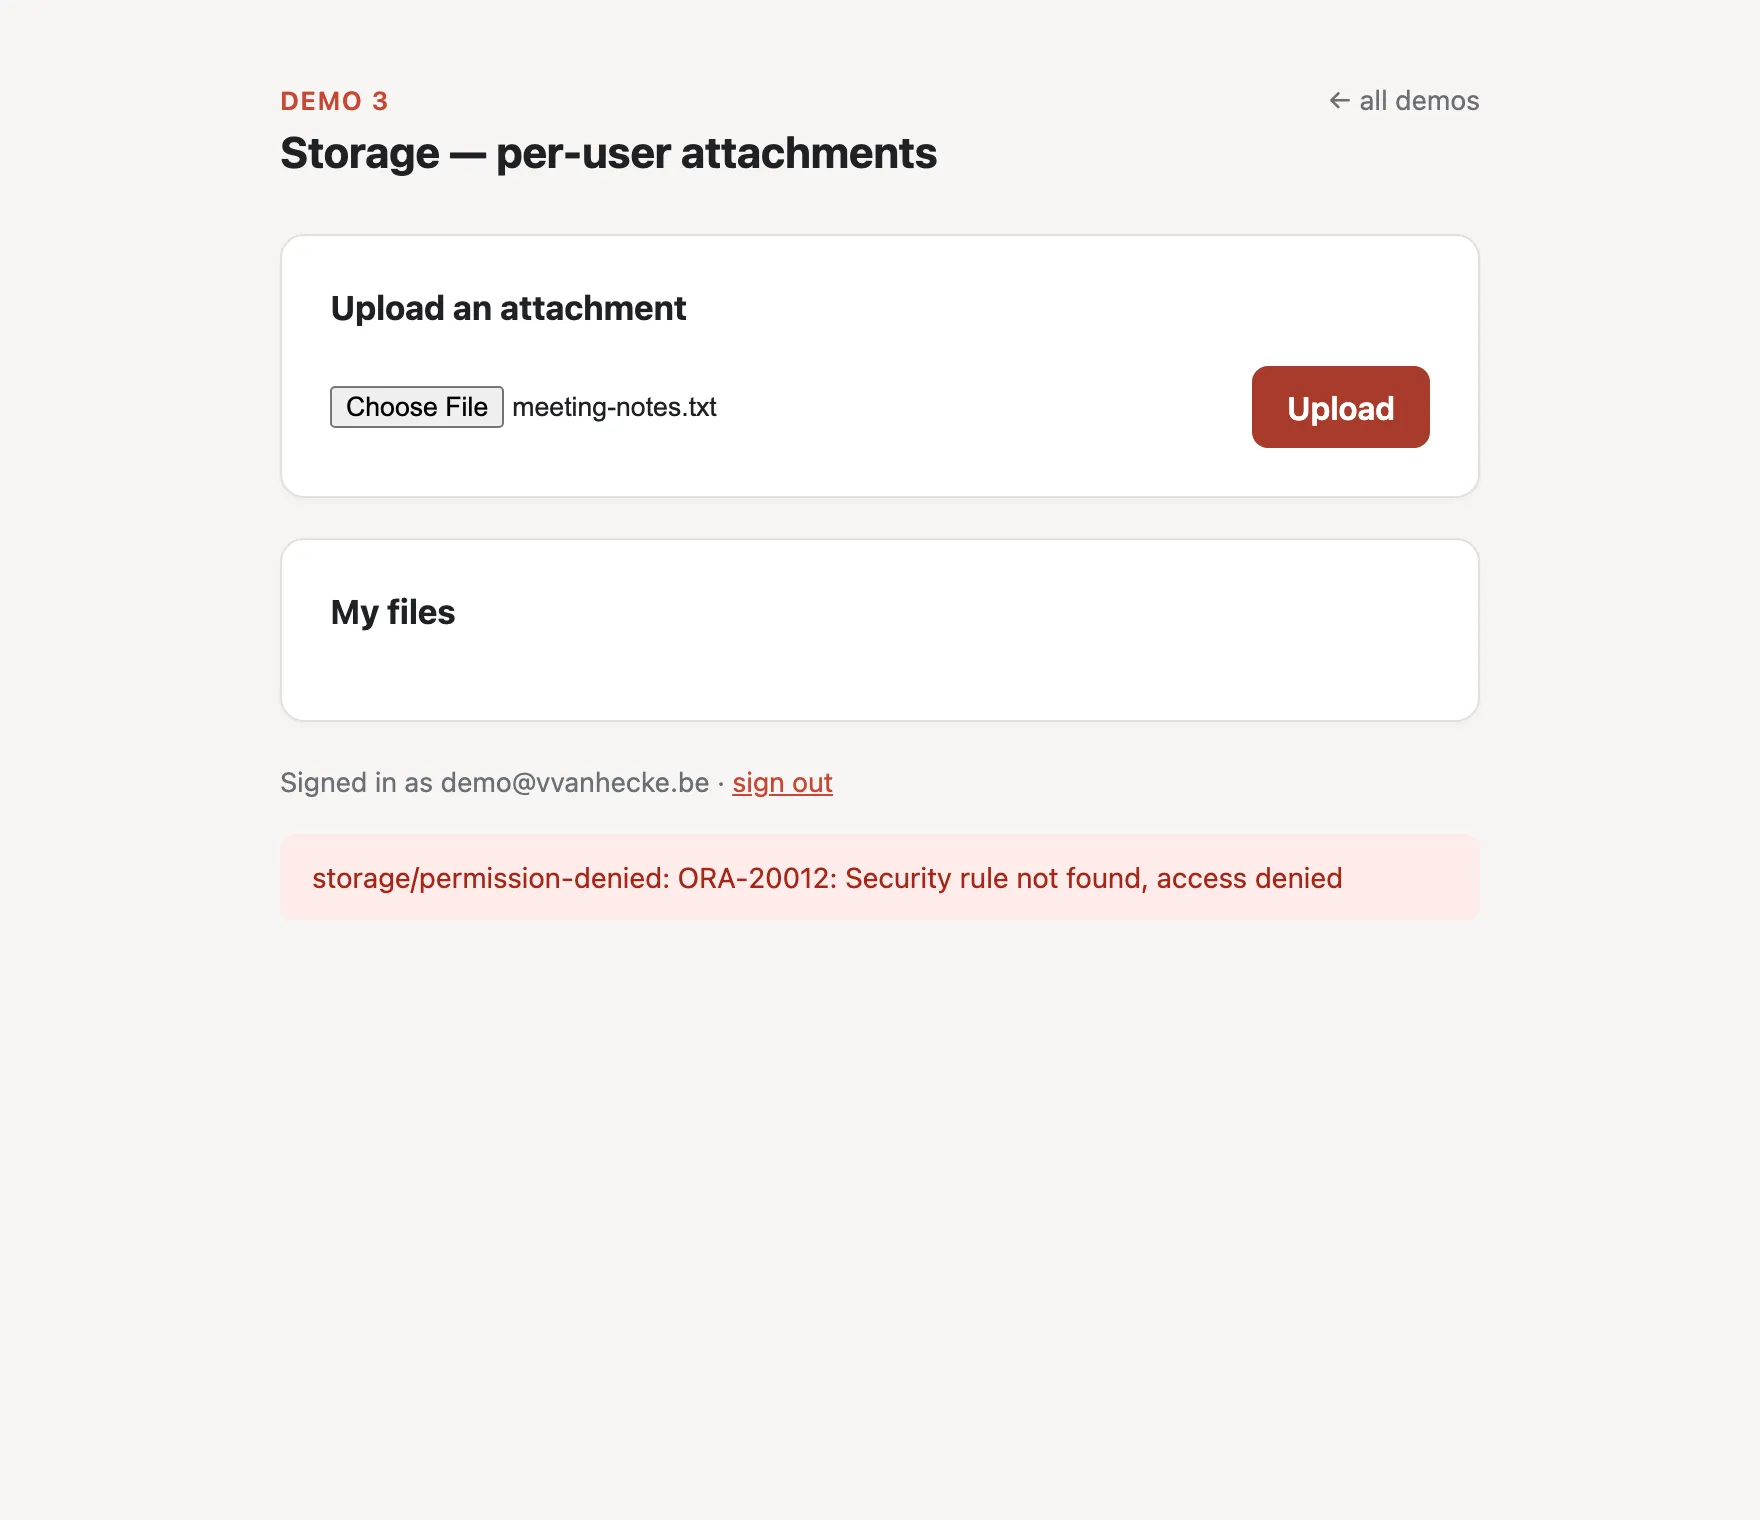
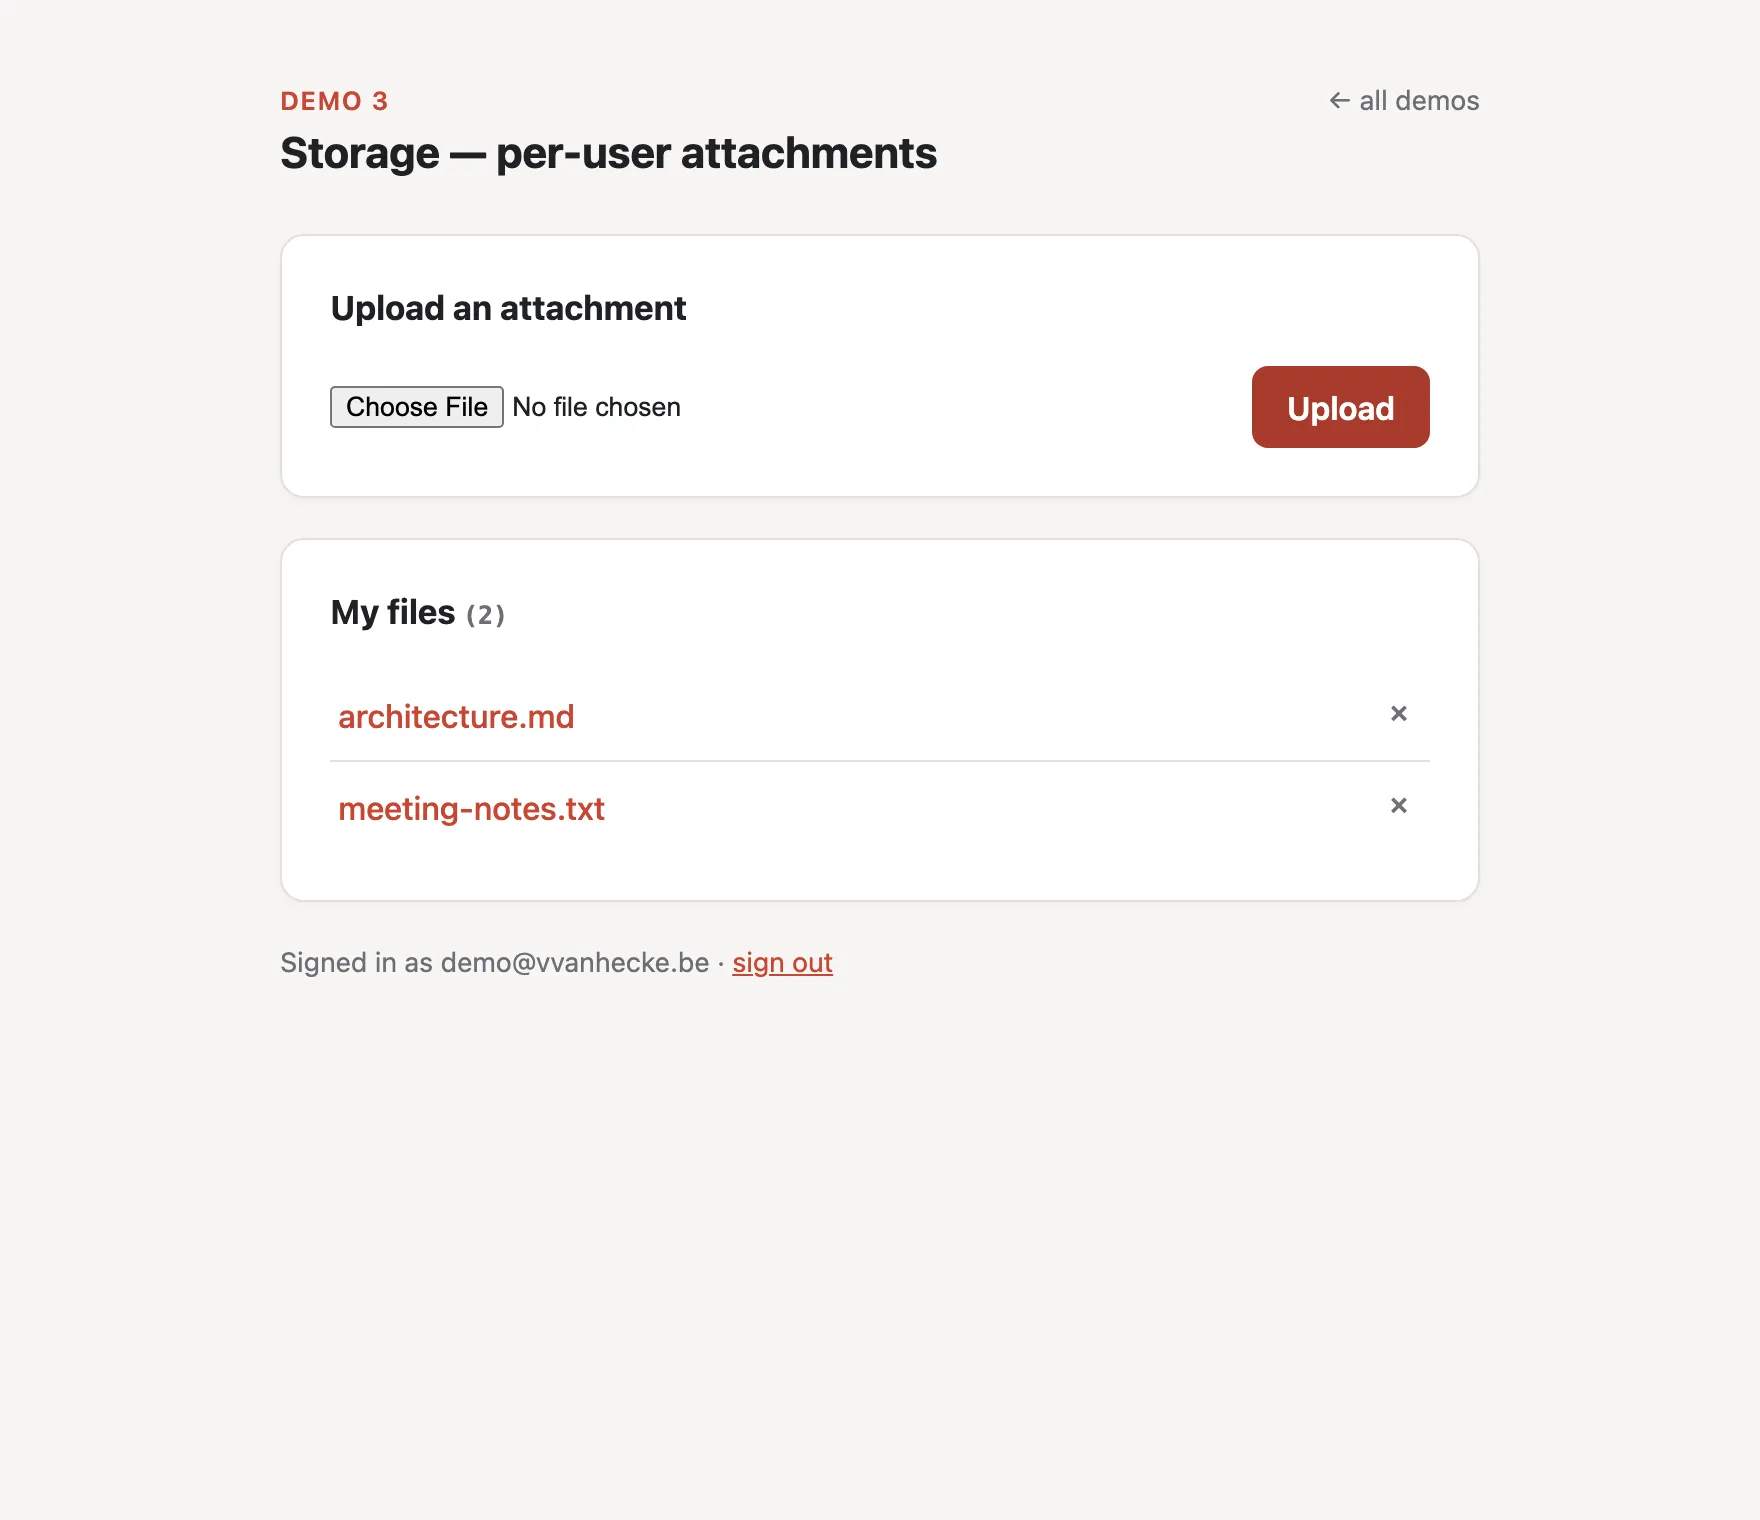
By now you know the rhythm. Upload a file, and:
Configure it in the Console
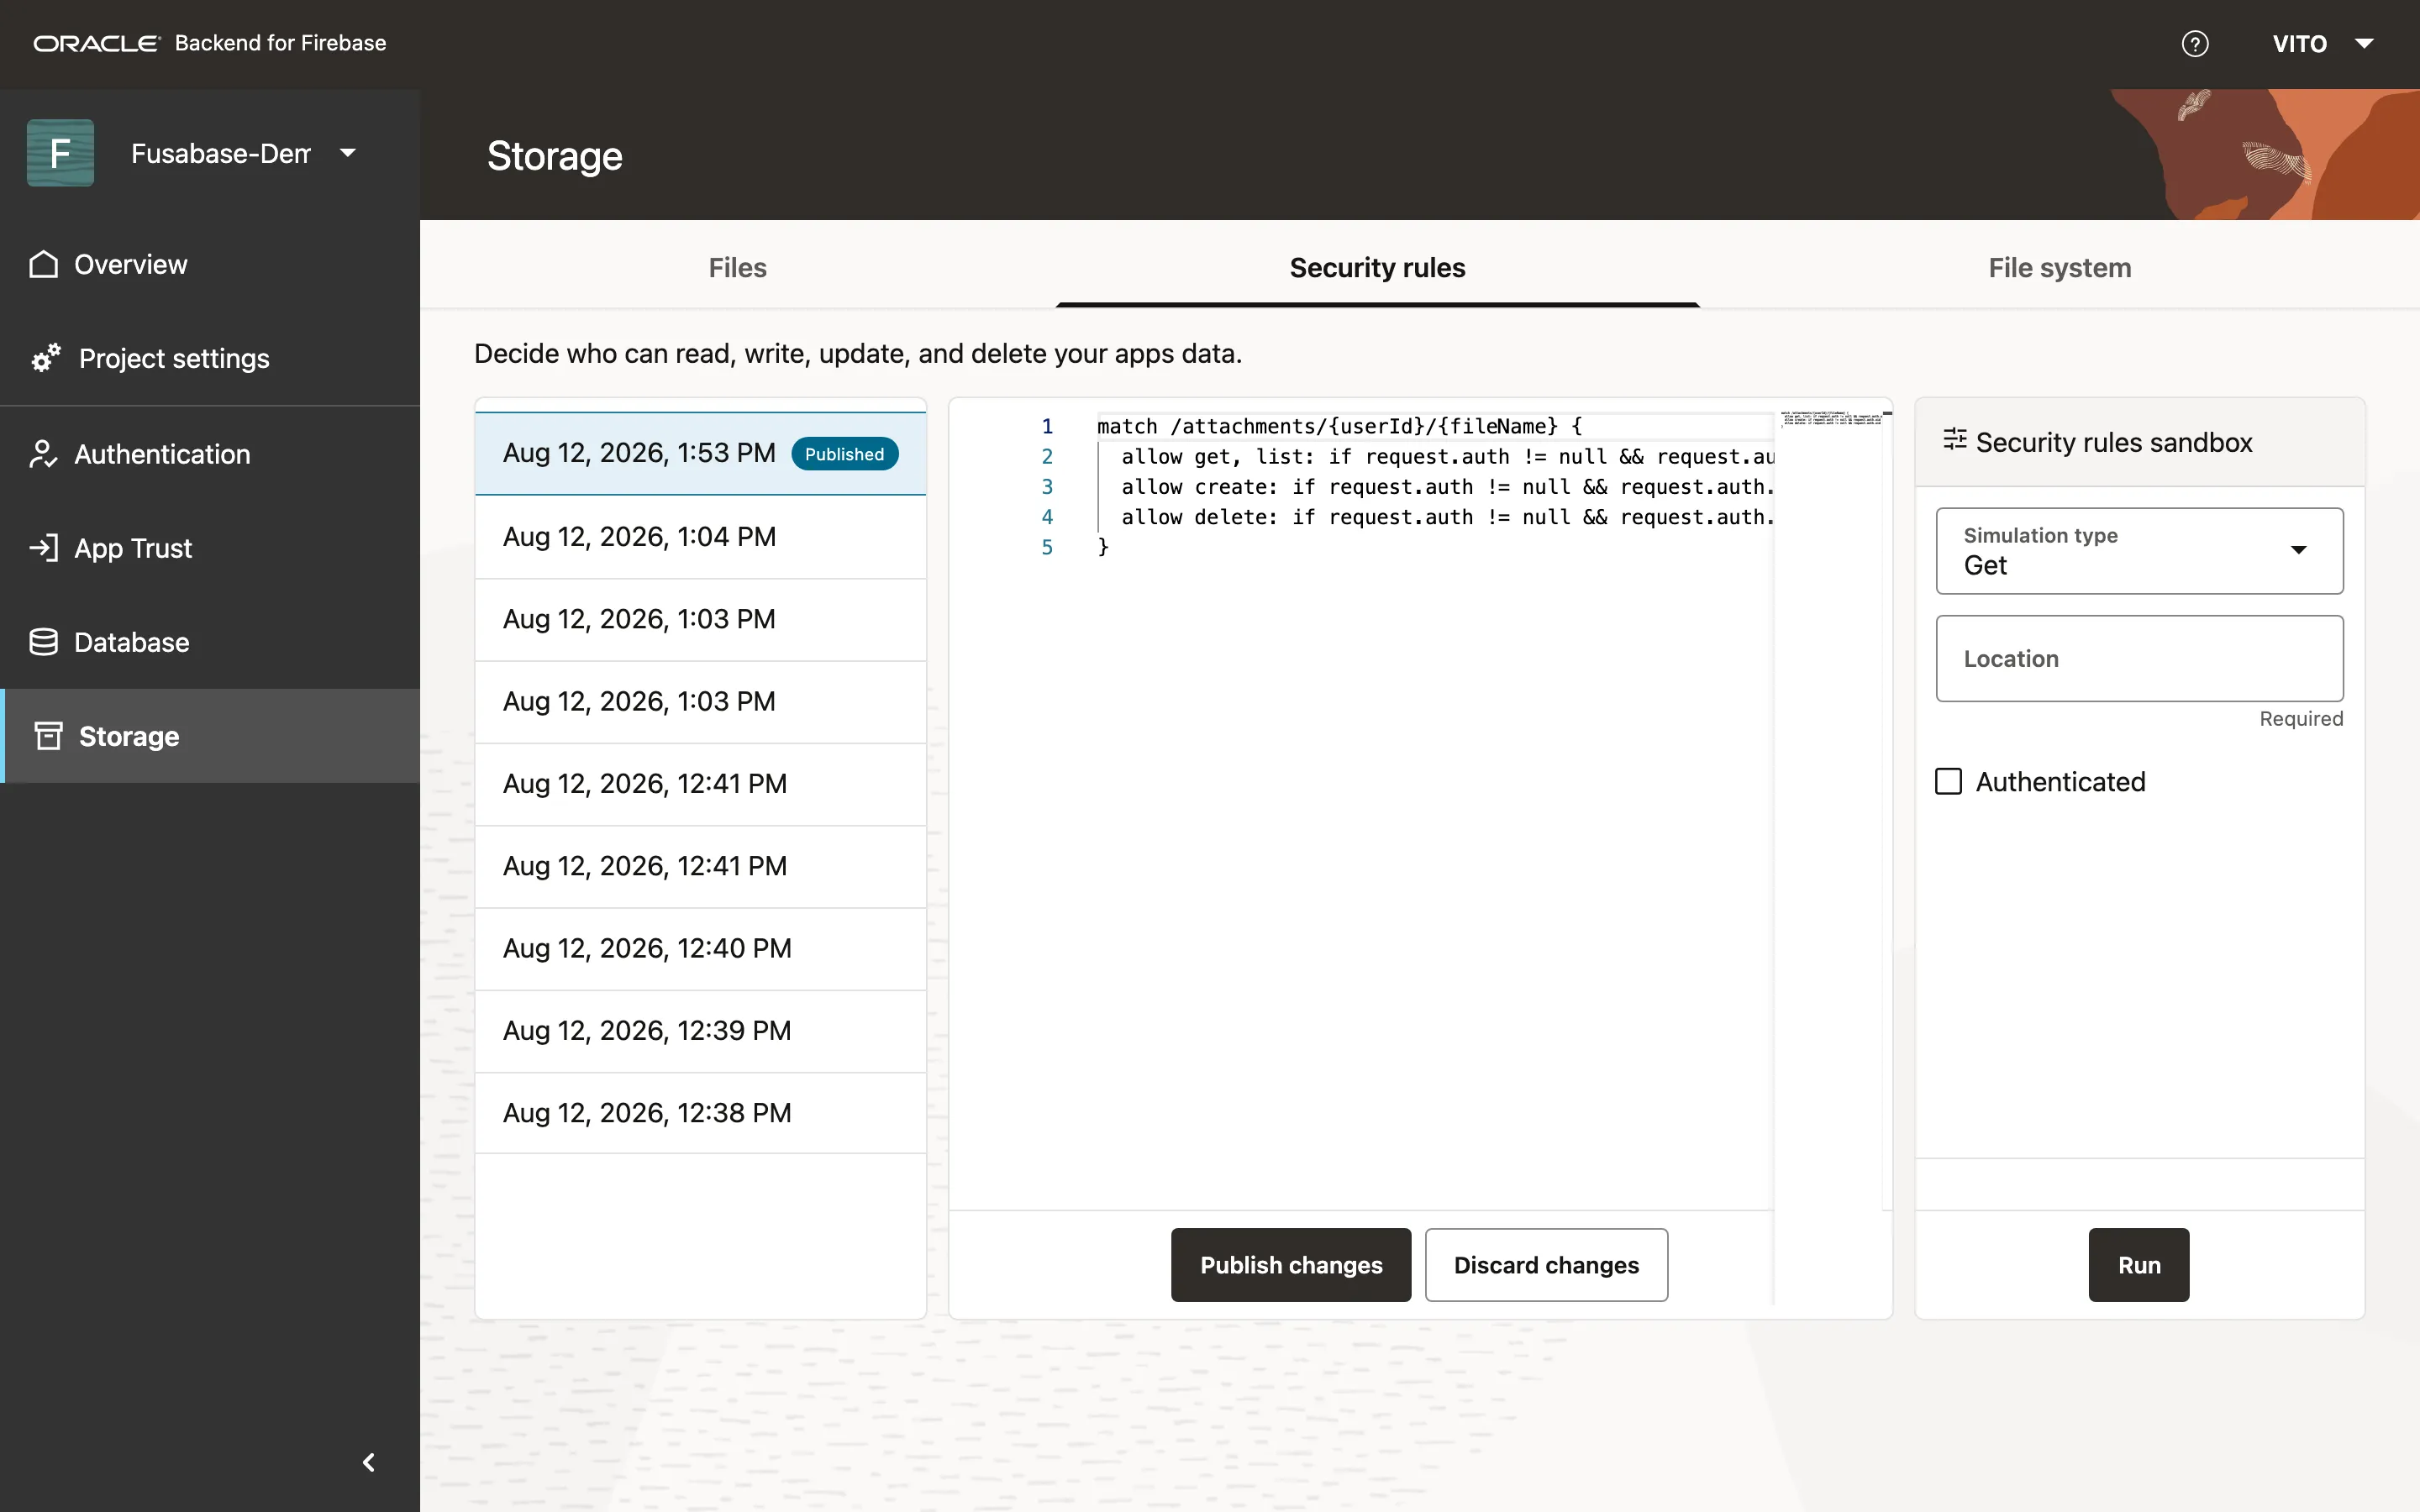
Storage rules use the same structure with a slightly different vocabulary - you match bucket paths instead of documents, and here the rule enforces one thing: you can only touch your own folder (rules/storage.rules):
match /attachments/{userId}/{fileName} {
  // Only the owner of the folder can list, download, upload and delete.
  allow get, list: if request.auth != null && request.auth.uid == userId;
  allow create:    if request.auth != null && request.auth.uid == userId;
  allow delete:    if request.auth != null && request.auth.uid == userId;
}
And now it works
And the Console shows the file sitting in the user’s folder inside DBFS:
Demo 4: Realtime
This is the one that makes a mobile developer’s eyes light up. onSnapshot replaces “read once” with “subscribe”: you hand it the same query as getDocs, and your callback fires again every time the underlying data changes. Demo 4 puts two independent listeners on the same todos query, side by side as Device A and Device B:
import { onSnapshot, query, collection, where, orderBy } from "fusabase/oracledb";

const q = query(
  collection(db, "todos"),
  where("uid", "==", user.uid),
  orderBy("createdAt", "desc")
);

// fires now with the current data, then again on every change
const unsubscribe = onSnapshot(q, (snapshot) => {
  render(snapshot.docs.map((d) => ({ id: d.id, ...d.data() })));
});
Add a todo on one side and it appears on the other on its own - no refresh, no polling loop in your code:
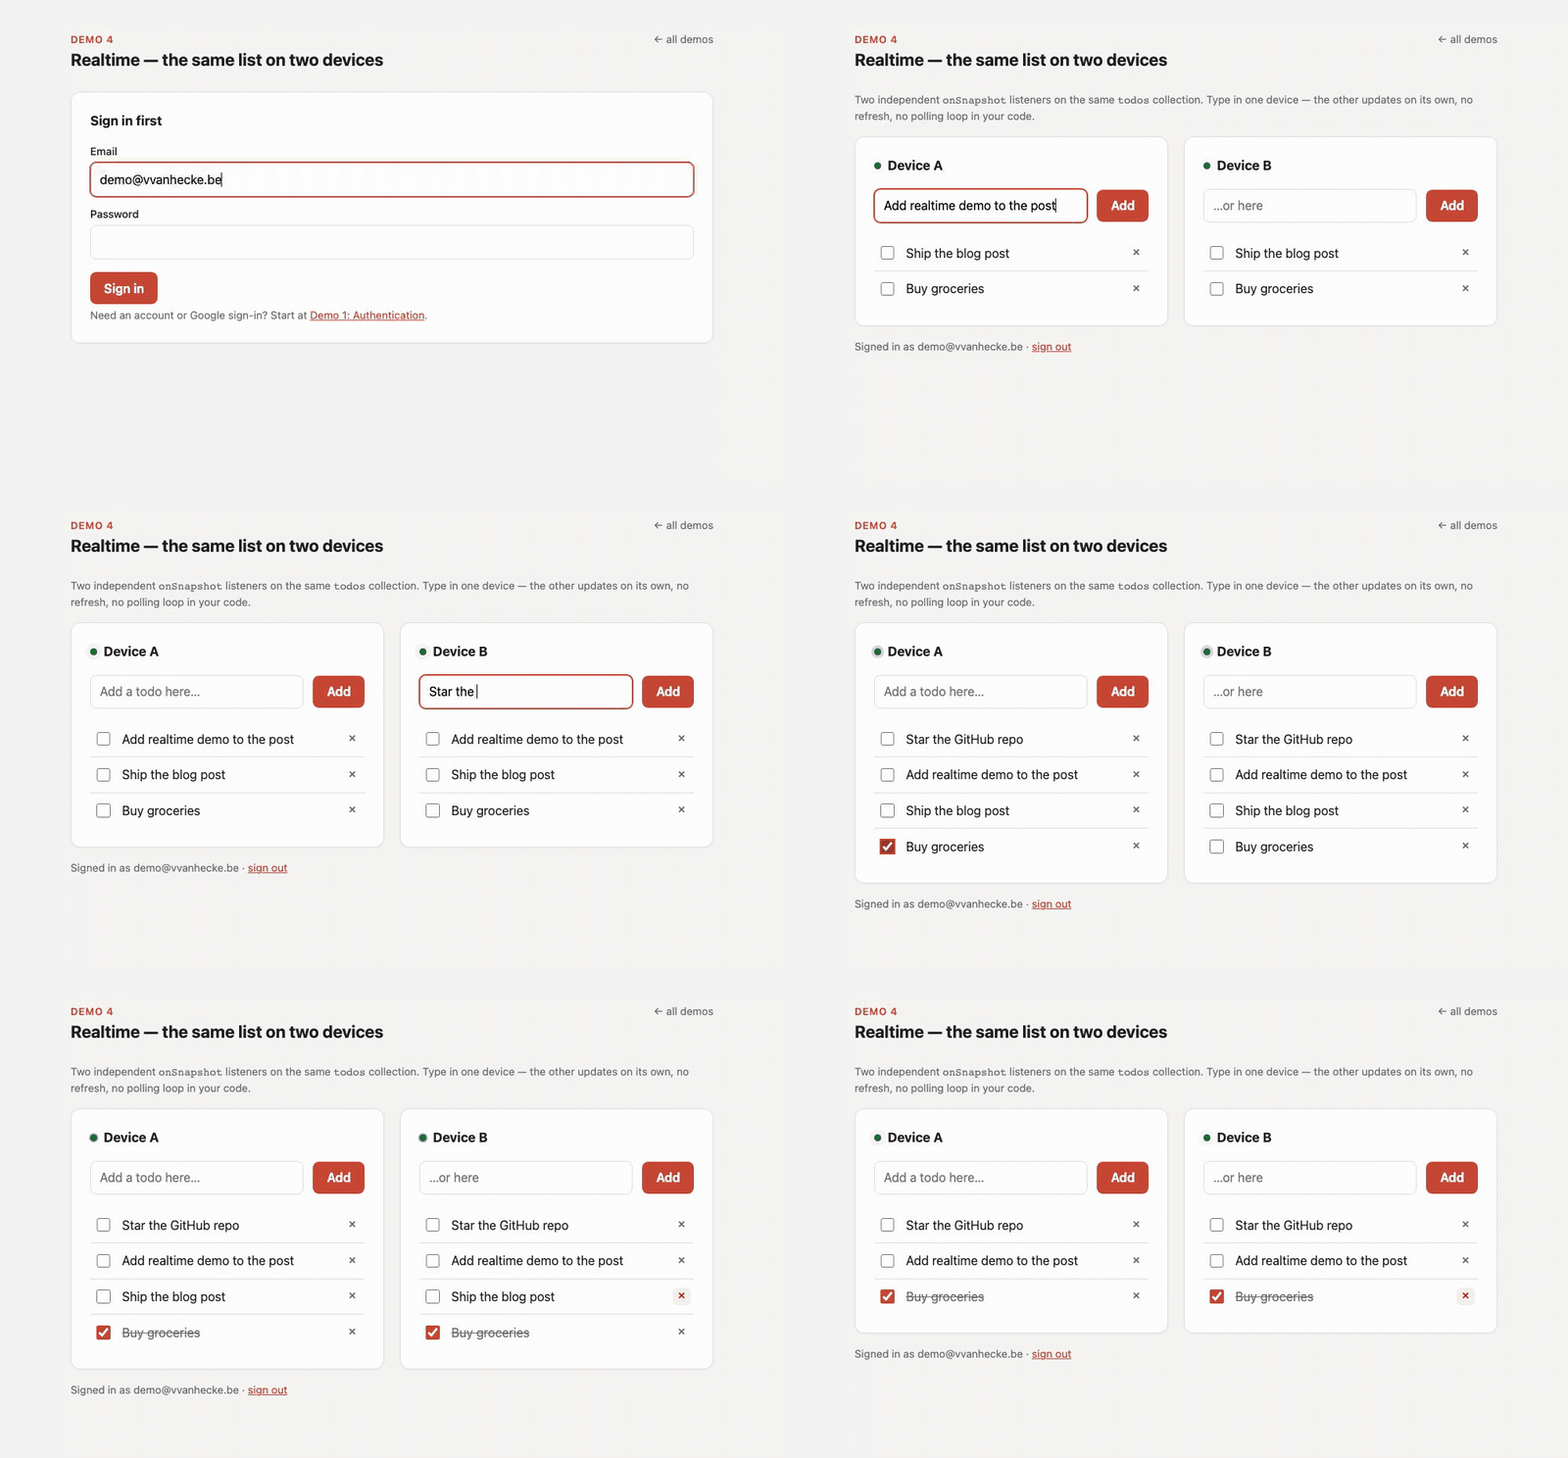
Now the honesty this series runs on. onSnapshot can get its updates in two different ways. The default is long polling - the client just re-asks the server “anything new?” on a timer - and that timer defaults to 30 seconds, so out of the box “realtime” can mean “within half a minute.” You can drop it to the 5-second minimum with long_polling_interval, which is what the GIF above uses (watch closely - the other device lags by a beat):
const app = initializeApp({ ...fusabaseConfig, long_polling_interval: 5 });The other option is a real WebSocket (use_socket: true). It keeps a connection open so the server can send changes to the app as soon as they happen.
At least, that is how it is supposed to work. In my setup, I could not get it working properly. The connection opened and stayed open, but at first no changes came through. The database was detecting the changes and ORDS was processing them, but the ORDS logs showed No JWK State was identified to verify this JWT. It looked like ORDS could not verify the user’s sign-in token.
Did I miss a setup step? I could not find one in the documentation. After I manually added the JWT profile below, creates and updates started coming through:
-- run as the project schema (the REST-enabled owner)
BEGIN
  OAUTH.CREATE_JWT_PROFILE(
    p_issuer   => 'baas_onprem#<auth_id>',
    p_audience => '<project_id>',
    p_jwk_url  => 'https://<host>/ords/<schema>/_/baas-services/idm/signingKey/<project_id>/jwk'
  );
  COMMIT;
END;
/
Even then, it did not feel completely realtime. Creates and updates were usually one or two seconds behind, and deletes did not come through the WebSocket at all in my tests. They only appeared on the next poll.
This may be a problem with my setup, or there may be another configuration step I missed. For the demo I therefore used 5-second long polling, because that worked consistently for creates, updates and deletes. I would be interested to know whether others see the same behavior with Fusabase’s use of WebSockets.
The takeaway
The first three demos each hit the same kind of wall - one trip to the Console apiece:
| You try to | It fails with | You configure |
|---|---|---|
| Sign in from the web app | ORDS-13002, origin not authorized | Authorized domains |
| Write a document | ORA-20015, no security rule | Database rules |
| Upload a file | ORA-20012, no security rule | Storage rules |
Everything here fails closed: no authorized domain means no sign-in, and no security rule means denied. Frustrating on day one, exactly right on day ninety - the configuration you’re forced to write is your security model, and there’s never a window where the defaults were protecting you by accident.
And the Firebase-shaped API on top means the app code itself is boring, in the best possible way - four small demos, and the only real surprises were the two storage-rule quirks and the realtime transport. Everything is in the demo repo to clone and point at your own project.
Previous: Part 1 - What it is and setting it up